Why You’ll Love It

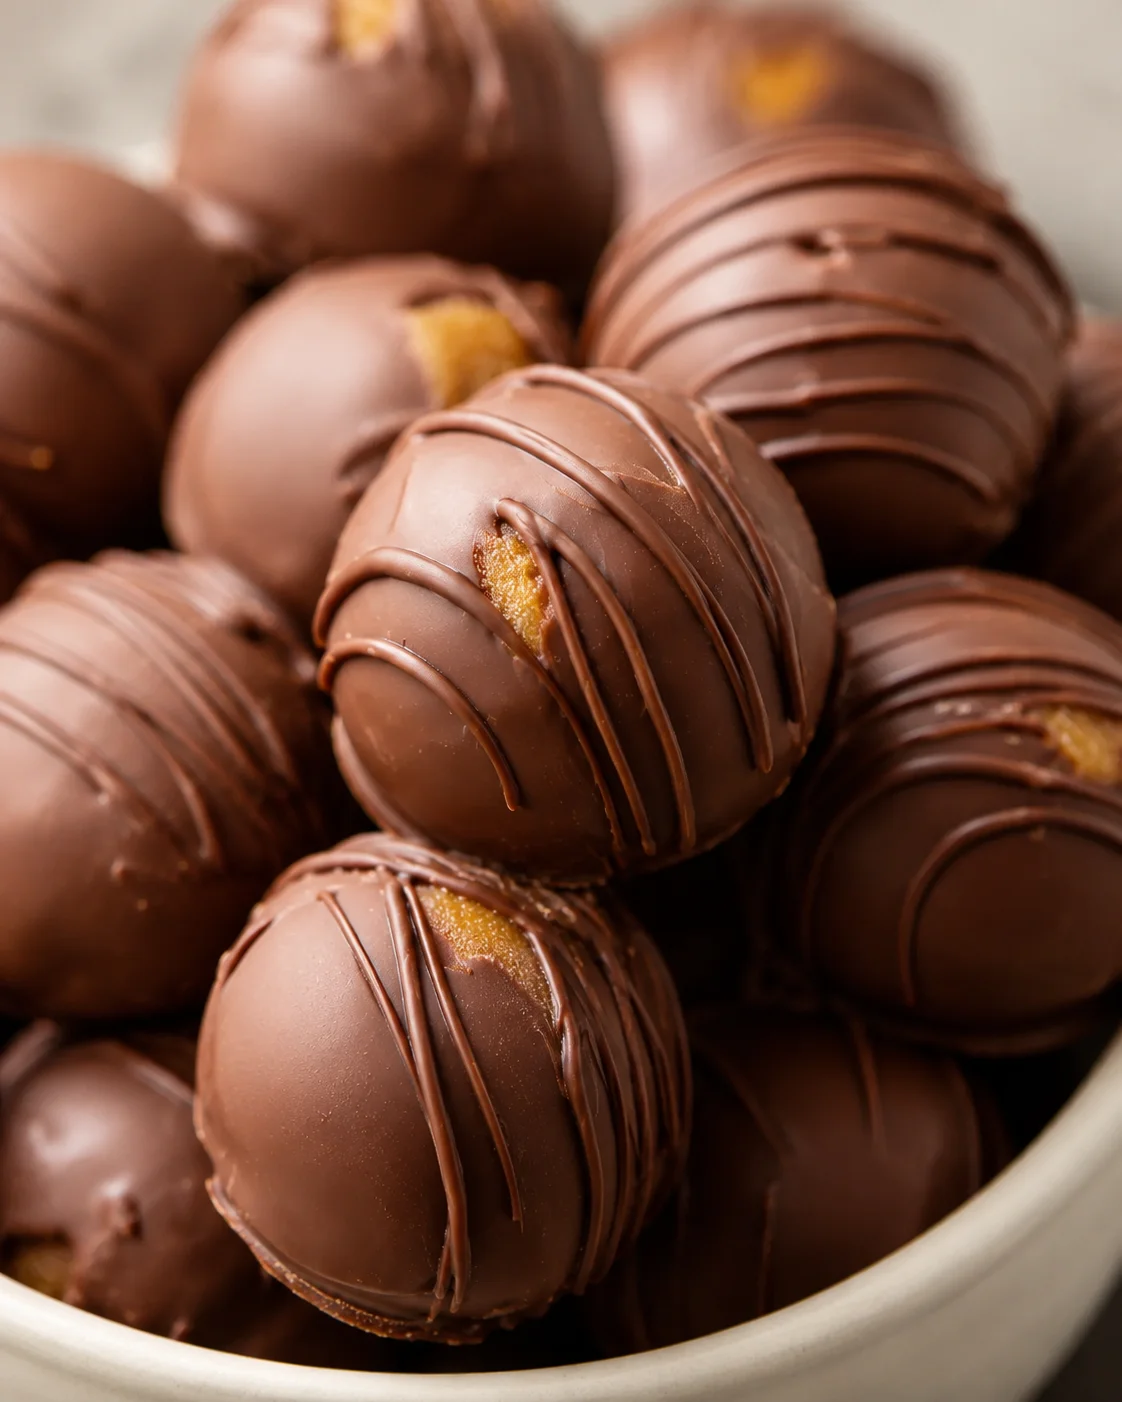
There’s just something so comforting about a little bite-sized snack that packs a punch of nostalgia wrapped in smooth chocolate. Peanut Butter Balls—or Buckeyes if you like to keep a small peanut butter circle showing—are a go-to no-bake treat that blends creamy peanut butter, sweet powdered sugar, and rich chocolate into one magical morsel. They vanish from the plate almost as quickly as you make them, and honestly, I don’t blame anyone for snatching seconds.
Growing up, these little peanut butter wonders were a holiday staple in our kitchen. My mom would carefully line them up on wax paper, each perfectly round and glossy with melted chocolate. The aroma alone made the kitchen smell like a sweet candy shop. Now, making Peanut Butter Balls feels like revisiting a cozy family tradition—plus, they’re ridiculously simple to whip up and taste exactly like warm memories.
The beauty of this Peanut Butter Balls recipe? No baking, no fancy gadgets, and no complicated steps. It’s a total beginner-friendly treat that packs serious flavor with barely any effort. Whether it’s for holiday cookie trays, a sweet gift for friends, or just sneaking a quiet midnight snack, these little balls of joy never fail to hit the spot.
Today, I’m sharing my favorite version—creamy, perfectly sweet, and cloaked in just the right amount of chocolate so that satisfying crack breaks free with every bite.
Why You’ll Love It
- Simple No-Bake Treat: No oven needed, no fuss—just mix, shape, chill, and dip. Perfect if you’re short on time or kitchen confidence.
- Iconic Flavor Match: Peanut butter and chocolate together? It’s a classic combo that’s endlessly satisfying every single time.
- Everyone’s Favorite: Whether it’s the holidays, a bake sale, or just a casual get-together, these disappear faster than baked cookies.
- Make-Ahead Friendly: Freeze them or stash them in the fridge to keep on hand for whenever that sweet tooth calls.
- Easy to Customize: Tweak the texture, sweetness, or chocolate coating to suit your family’s taste buds (some of my favorite ideas are below!).
Ingredient Notes & Details
Peanut Butter:
Choose creamy peanut butter for the smoothest, easiest-to-roll dough. Tried and true brands like Jif or Skippy work best since they hold together without being oily. Skip natural peanut butter that separates—those oils can make your dough too loose and tricky to handle.
Powdered Sugar:
Also called confectioners’ sugar, it sweetens and helps give the dough structure. Sifting it before adding keeps everything silky smooth and lump-free.
Butter:
Use unsalted butter at room temperature—this adds richness and helps hold your mixture together without drying it out.
Vanilla Extract:
A splash of vanilla gives warmth and brings a subtle bakery-quality flavor to your Peanut Butter Balls. Totally optional, but I highly recommend it!
Salt:
Just a pinch really makes the flavors pop, balancing the sweetness and enhancing that peanut butter nuttiness.
Chocolate Chips:
Semi-sweet is classic, but feel free to pick dark or milk chocolate depending on what you love. Use good-quality chocolate for the best taste and shine.
Coconut Oil or Shortening (optional):
Stirring in a tablespoon softens the melted chocolate and helps coat the balls smoothly with a nice glossy finish.
Step-by-Step Instructions
Step 1: Mix the Peanut Butter Base
Start by combining the creamy peanut butter, softened butter, and vanilla extract in a large bowl. Use a hand mixer to blend until everything is smooth and creamy. Then, slowly add the powdered sugar, about half a cup at a time, mixing well after each addition. Your dough should be thick but still easy to roll, not sticky. If it’s too soft, add powdered sugar little by little until it gets just right.
Step 2: Roll into Balls
Line a baking sheet with parchment or wax paper. Scoop out small portions—about an inch across—and roll them between your palms to form smooth balls. Place them on your prepared sheet. After shaping them all, pop the tray in the fridge for at least 30 minutes to firm up.
Step 3: Melt the Chocolate
Put your chocolate chips and optional coconut oil or shortening in a microwave-safe bowl. Heat in 20- to 30-second bursts, stirring between intervals until melted and silky. You can also melt the chocolate over a double boiler if that feels safer.
Step 4: Dip the Peanut Butter Balls
Grab a fork or toothpick and dunk each chilled ball into the melted chocolate, coating it fully. Let the extra drip off, then set it back onto the parchment. If you want that classic “Buckeye” look, dip about three-quarters of the way so a bit of peanut butter shows on the top.
Step 5: Chill to Set
Once coated, refrigerate the peanut butter balls for 20 to 30 minutes until the chocolate hardens and gains that perfect snap.
Step 6: Ready to Enjoy!
Once the chocolate is firm, you can move your Peanut Butter Balls to an airtight container or arrange them on a pretty platter. They’re delicious chilled or left at room temperature for a bit, especially with a cold glass of milk alongside.
FAQ
1. Can I use natural peanut butter for these Peanut Butter Balls?
You can—just be warned, natural peanut butter tends to separate and may make the mixture too oily or soft. If you want to use it, stir it thoroughly and add extra powdered sugar to firm things up.
2. How long do Peanut Butter Balls keep?
Stored in an airtight container in the fridge, they last up to two weeks. If you freeze them, they can keep for three months or more.
3. Is it okay to skip the chocolate coating?
Absolutely! These taste great without chocolate too. You can roll them in crushed peanuts, dust them with cocoa powder, or even drizzle melted white chocolate over them instead.
4. Why are my Peanut Butter Balls sticky or too soft?
If your dough feels sticky, it usually needs more powdered sugar or a quick chill before shaping. The key is having a firm yet pliable dough that rolls easily without sticking.
5. Can I swap the chocolate for white or dark varieties?
Definitely! White chocolate gives a creamy sweetness that’s lovely with peanut butter, while dark chocolate offers a richer, slightly bitter contrast that’s just delicious.
6. How do I get that shiny chocolate coating?
Add a teaspoon of coconut oil or shortening to your melted chocolate. This helps give you a smooth, glossy finish that looks professional.
Storage Tips
After the chocolate coating is fully set, store your Peanut Butter Balls like this:
- In the Fridge: They last up to two weeks when chilled. Keep them covered and arranged in a single layer or separated by parchment paper.
- In the Freezer: Freeze for up to three months. Freeze them first on a tray so they don’t stick, then pack in airtight containers with parchment between layers.
- Room Temperature: They’re safe to sit out for a few hours if it’s cool, but avoid warm spots where the chocolate might soften or melt.
When pulling from the freezer, thaw in the fridge for a few hours or at room temperature for about 15 to 20 minutes. If the shiny chocolate loses some gloss, you can drizzle a little fresh melted chocolate over the top to refresh the look.
Make-Ahead Tips
These Peanut Butter Balls are fantastic for prepping in advance, making your dessert game stress-free:
- Make the peanut butter dough, shape the balls, and store them covered in the fridge for up to 2 days before dipping.
- Dip in chocolate right before serving or freeze the uncoated balls and dip later after thawing.
- Fully coated balls freeze beautifully too—just thaw and serve directly.
- Make batches ahead for holiday parties or gift-giving to save time when the schedule gets crazy.
Variations
Crunchy Peanut Butter Balls:
Swap creamy peanut butter for crunchy to add a delightful texture burst with little nutty bits in every bite.
Oreo Peanut Butter Balls:
Mix in half a cup of finely crushed Oreo cookies or your favorite chocolate sandwich cookies for extra chocolate flavor and fun texture.
Pretzel Peanut Butter Balls:
Stir in finely crushed pretzels before shaping to bring a salty crunch that balances perfectly with the sweetness.
White Chocolate Drizzle:
After dipping in dark or semi-sweet chocolate, drizzle melted white chocolate on top for a festive, pretty finish—great for holiday treats.
Holiday Peanut Butter Balls:
Add colorful sprinkles, crushed candy canes, or chopped nuts to the chocolate coating while it’s still wet to customize for any holiday or celebration.
Protein-Packed Version:
Swap a quarter cup of powdered sugar for vanilla or chocolate protein powder to sneak in some extra fuel without sacrificing sweetness.
Peanut Butter Balls balance simple ingredients with timeless flavor in a way that always feels like a warm hug in dessert form. Whether you’re looking to please a crowd at holiday parties, brighten a lunchbox, or keep a sweet snack stocked, they’re a solid go-to. Every bite brings that cozy peanut butter and chocolate combo we all know and love.
Welcome! You’re about to whip up one of the easiest, most nostalgic no-bake delights out there: creamy peanut butter rolled into perfect little balls and coated in luscious chocolate. These Peanut Butter Balls, or Buckeyes if you leave a bit of peanut butter showing, are a no-fuss treat that’s forgiving to make and perfect for everything from holiday trays to sweet snacks or last-minute gifts.
Keep reading for a straightforward ingredients list using pantry basics, step-by-step shaping and dipping tips, plus tricks to nail the texture and get that shiny chocolate coating just right. I’ll also cover quick fixes, smart storage and freezing advice, and simple mix-in ideas so you can personalize your batch.
- Prep time: Quick hands-on mixing in about 15 minutes, plus chilling. Most batches are ready in under an hour.
- Learn: Ingredient swaps, shaping and dipping techniques, and how to rescue soft or sticky dough.
- Extras: Make-ahead hacks, freezer friendly pointers, and mix-in ideas like cookies or pretzels for flavor twists.
Why You’ll Love Them
- No-bake and super beginner-friendly — no oven required, with minimal hands-on time, perfect for busy days. If you love no-bake desserts, try our No Bake Strawberry Cheesecake.
- Classic crowd-pleaser flavors — peanut butter and chocolate together never get old.
- Great for make-ahead or freeze-ahead prep — perfect for holiday trays, gifting, or quick entertaining. For another freezer-friendly crowd-pleaser, see this Easy Strawberry Crunch Ice Cream Cake.
- Customizable — easy to change up the coating, add mix-ins, or swap nut butters to fit preferences or diets.
- Portable, portion-controlled treats — great for bake sales, lunchboxes, or snack platters.
What You’ll Need
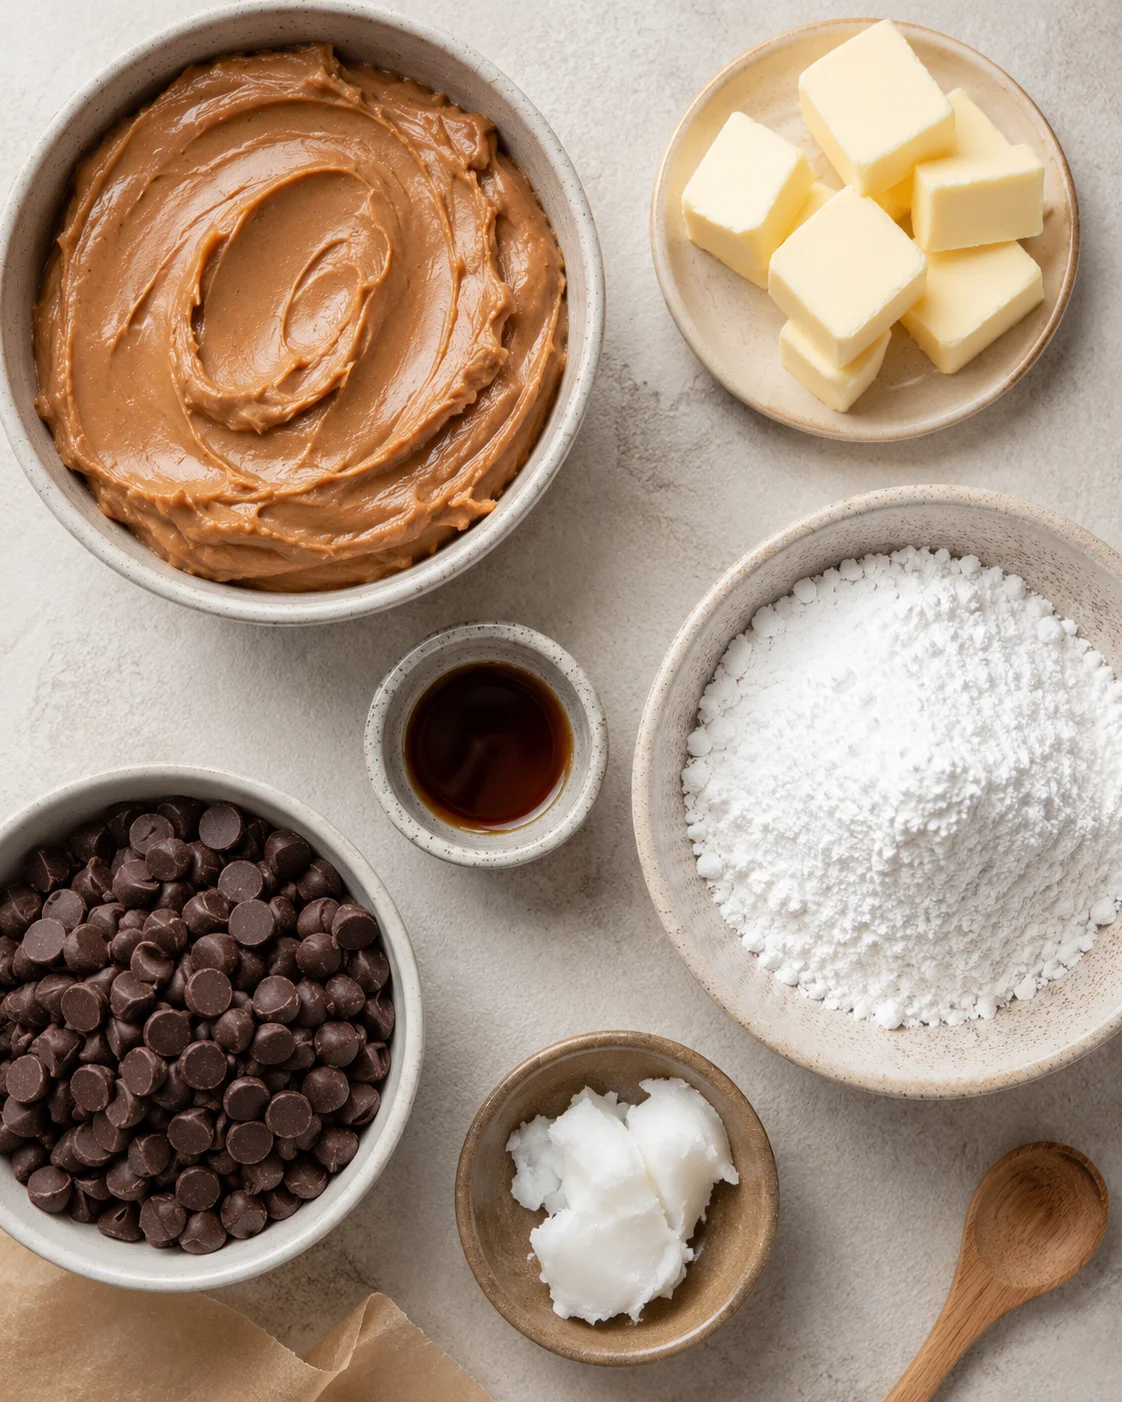
- 1 cup creamy peanut butter (avoid natural or oily types)
- 4 tablespoons unsalted butter, softened
- 1 teaspoon pure vanilla extract
- 1/4 teaspoon salt
- 1 1/2 cups powdered sugar, sifted
- 2 cups semi-sweet chocolate chips (or milk chocolate if preferred)
- 1 tablespoon vegetable shortening or coconut oil for smooth dipping
Assemble, Chill, and Dip
- Line a baking sheet with parchment or wax paper.
- In a large bowl, beat together creamy peanut butter, softened unsalted butter, vanilla extract, and salt until smooth.
-
Gradually add sifted powdered sugar (about 1/2 cup at a time) and mix until the dough is thick and not sticky; add more powdered sugar by tablespoon if too soft.
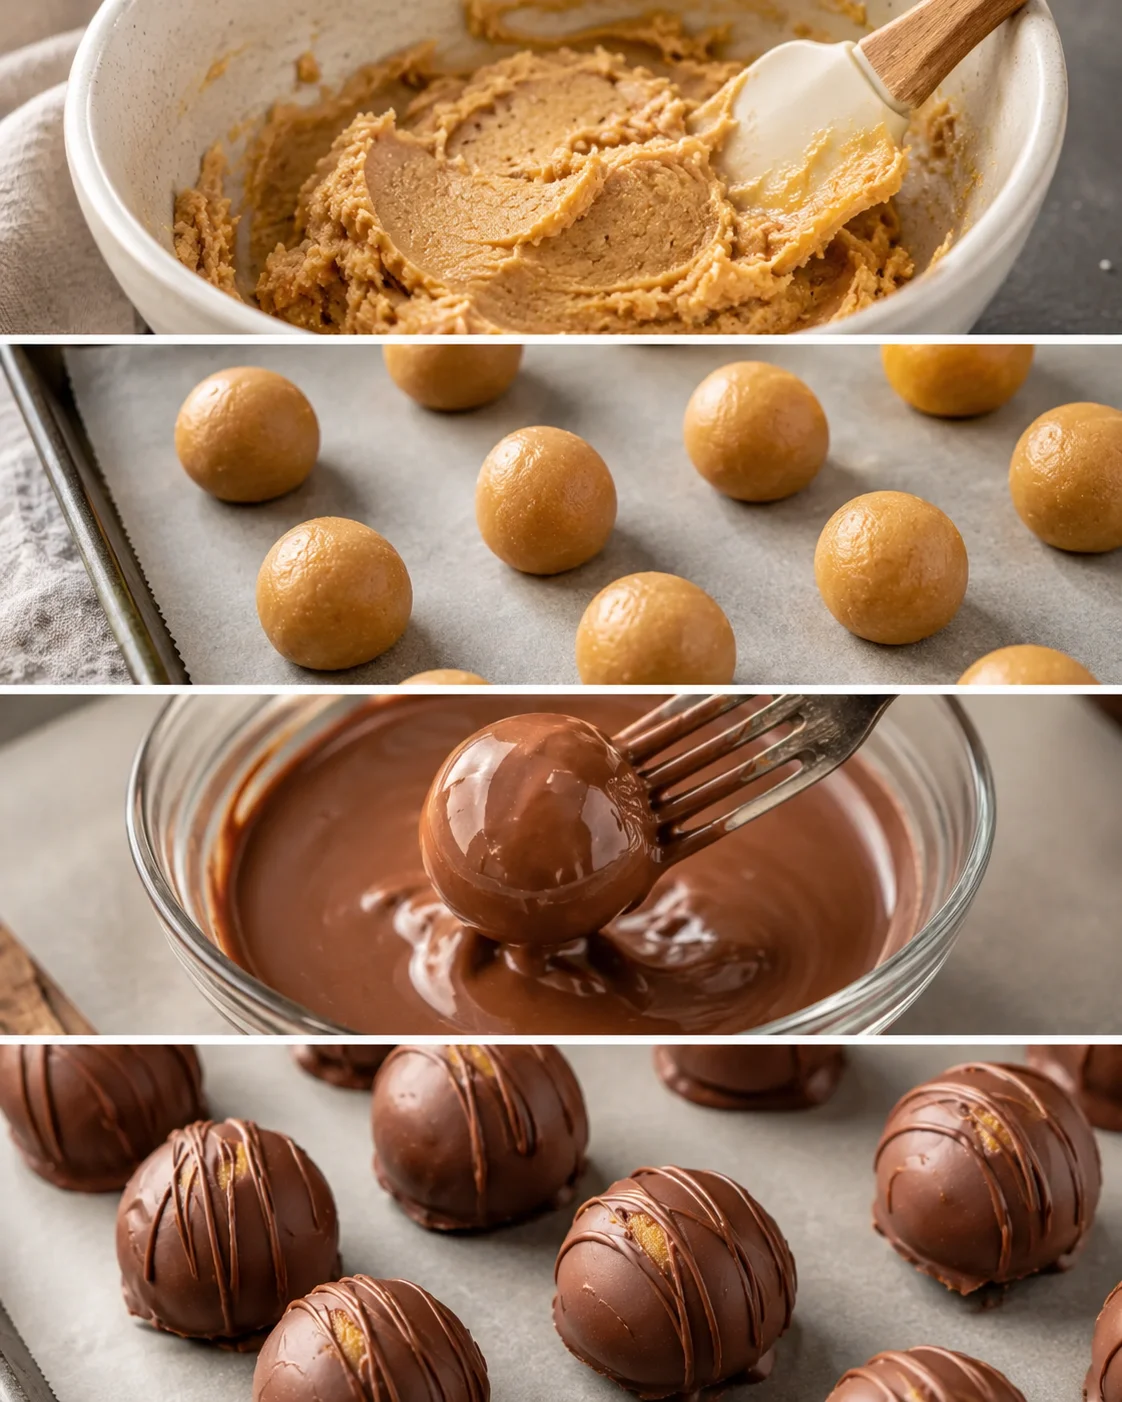
- Scoop roughly 1-inch portions and roll between your palms into smooth balls; place them on the prepared sheet.
- Refrigerate the balls for 30 to 45 minutes (or freeze 10 to 15 minutes) until firm.
- Combine chocolate chips and coconut oil or shortening in a microwave-safe bowl and melt in 20–30 second bursts, stirring until smooth (or melt over a double boiler).
- Dip each chilled ball into the melted chocolate using a fork or toothpick, tap off excess, and return to the parchment (dip three-quarters for a Buckeye look if desired).
- Refrigerate the dipped balls for 20 to 30 minutes until the chocolate is fully set and firm.
Pro Tips for Best Results
- Always use creamy, shelf-stable peanut butter for smooth dough; natural peanut butters that separate can make it greasy and loose.
- Sift powdered sugar first to avoid lumps and guarantee smooth dough.
- If your dough feels sticky, chill it or add more powdered sugar a tablespoon at a time until it rolls nicely.
- Make sure the peanut butter centers are well chilled before dipping or the chocolate will melt and get messy.
- Melt chocolate gently: stop microwaving when mostly melted and stir until smooth to avoid burning or seizing.
- If chocolate seizes, stir in a teaspoon of coconut oil or shortening to loosen it up again.
- A small cookie scoop helps create even-sized balls that set and coat evenly.
- Add a teaspoon of coconut oil to the melted chocolate for a glossy, professional finish.
- Avoid sudden temperature changes—don’t move dipped balls from cold to hot environments quickly to prevent chocolate cracking or blooming; for more on preventing bloom when dipping, see these chocolate-dipped pretzel tips.
Flavor Swaps and Add-Ins
- Use crunchy peanut butter instead of creamy for a fun texture surprise in every bite.
- Make Buckeyes by dipping only three-quarters of each ball to leave a peanut butter dot showing on top.
- Try sunflower seed or soy nut butter for a nut-free alternative—adjust powdered sugar as needed for texture.
- Add ½ cup finely crushed Oreos or chocolate cookies to the dough before rolling for a chocolate twist.
- Mix in crushed pretzels or potato chips for a sweet-and-salty crunch that’s irresistible—if you love that combo, try these Popcorn Chocolate Chip Cookies for another snack-studded dessert idea.
- Boost protein by swapping part of the powdered sugar for flavored protein powder—start with ¼ cup and adjust for dough consistency.
- Experiment with white chocolate, dark chocolate, or yogurt coatings, then top with nuts, sprinkles, or contrasting drizzles.
- Mix in add-ins like cocoa powder, cinnamon, or mini chocolate chips to vary the flavor.
Storage and Freezing Tips
Keep your Peanut Butter Balls fresh and delicious by storing properly:
- Refrigerate: Up to 2 weeks. Keep them chilled in an airtight container, separating layers with parchment to prevent sticking.
- Freeze: Up to 3 months. Flash-freeze on a tray first, then transfer to a freezer-safe container with parchment between layers.
- Room Temperature: Fine for a few hours if cool, but avoid warm rooms where chocolate would soften or melt.
When ready to enjoy, thaw frozen Peanut Butter Balls in the fridge for a few hours or leave at room temperature for 15–30 minutes. If needed, refresh the chocolate shine by drizzling a little melted chocolate on top, or make a quick, silky chocolate ganache, instead of reheating the whole piece.

Common Questions Answered
- Q: Can I use natural peanut butter?
A: Yes, but natural types tend to separate, making the dough oily. Stir well and add extra powdered sugar until firm enough to shape. - Q: Why are my Peanut Butter Balls too soft or crumbly?
A: Soft dough usually needs more powdered sugar or chilling. Crumbliness means too much sugar or not enough fat; add a bit of softened butter or peanut butter to fix. - Q: How do I get shiny chocolate coatings?
A: Stir a teaspoon of coconut oil or shortening into melted chocolate and melt gently for the best gloss. For a step-by-step look at dipping and setting chocolate for a glossy finish, see Easy Patriotic Chocolate-Dipped Cherries. - Q: Can I make these ahead of time for events?
A: Absolutely! They keep well in the fridge for up to 2 weeks or freeze for months. Thaw in the fridge before serving. Planning a dessert table you can prep early? Try Fireworks Sugar Cookies—a patriotic dessert that bakes up beautifully in advance. - Q: Are allergy-friendly substitutions possible?
A: Use sunflower seed or soy nut butter for a nut-free option, and pair with dairy-free chocolate and vegan butter to make them vegan-friendly. - Q: What if my chocolate seizes?
A: If chocolate gets grainy, stir in a teaspoon of coconut oil or shortening and warm gently to smooth it out. Avoid water, which causes seizing.
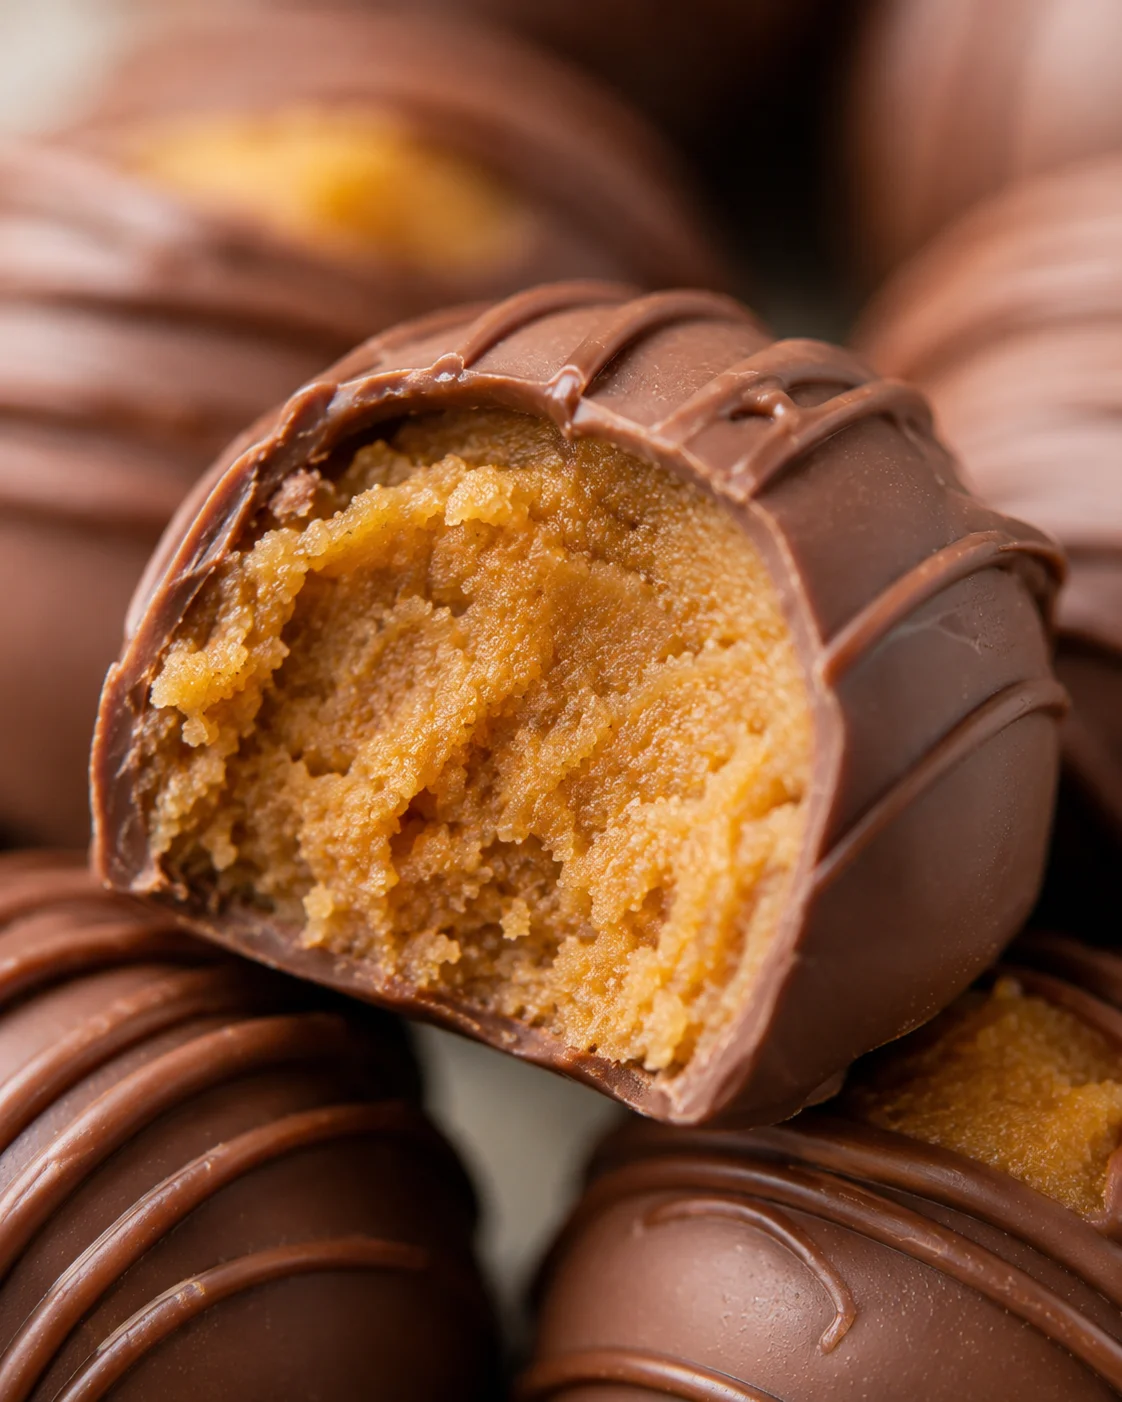
No-bake bite-sized treats combining creamy peanut butter, powdered sugar, and a rich chocolate coating. A nostalgic, simple snack that’s perfect for holidays, gifting, and snacking.
- Prep Time: 15 minutes
- Cook Time: 0 minutes (no baking)
- Total Time: 45 minutes (including chilling)
- Yield: About 24 balls (1-inch each) 1x
- Category: Dessert
Ingredients
- 1 cup creamy peanut butter (avoid natural or oily types)
- 4 tablespoons unsalted butter, softened
- 1 teaspoon pure vanilla extract
- 1/4 teaspoon salt
- 1 1/2 cups powdered sugar, sifted
- 2 cups semi-sweet chocolate chips (or milk chocolate if preferred)
- 1 tablespoon vegetable shortening or coconut oil (optional, for smooth dipping and glossy finish)
Instructions
- Line a baking sheet with parchment or wax paper.
- In a large bowl, beat together creamy peanut butter, softened unsalted butter, vanilla extract, and salt until smooth.
- Gradually add sifted powdered sugar (about 1/2 cup at a time) and mix until the dough is thick and not sticky; add more powdered sugar by tablespoon if too soft.
- Scoop roughly 1-inch portions and roll between your palms into smooth balls; place them on the prepared sheet.
- Refrigerate the balls for 30 to 45 minutes (or freeze 10 to 15 minutes) until firm.
- Combine chocolate chips and coconut oil or shortening in a microwave-safe bowl and melt in 20–30 second bursts, stirring until smooth (or melt over a double boiler).
- Dip each chilled ball into the melted chocolate using a fork or toothpick, tap off excess, and return to the parchment (dip three-quarters for a Buckeye look if desired).
- Refrigerate the dipped balls for 20 to 30 minutes until the chocolate is fully set and firm.
Notes
Use creamy, shelf-stable peanut butter to avoid oily or loose dough — natural peanut butters may require extra powdered sugar., Sift powdered sugar before mixing to avoid lumps and ensure smooth dough., If dough is sticky, chill or add powdered sugar by tablespoon increments until pliable., Melt chocolate gently to prevent burning or seizing; if it seizes, stir in a teaspoon of coconut oil or shortening to loosen., For shiny chocolate, add a teaspoon of coconut oil or shortening to melted chocolate., Make ahead by preparing dough and shaping balls in advance, refrigerate or freeze before dipping or after coating., Variations include using crunchy peanut butter, mixing in crushed Oreos or pretzels, or drizzling white chocolate., Store airtight in fridge up to 2 weeks or freeze up to 3 months, separating layers with parchment.
Nutrition
- Serving Size: 1 ball
- Calories: Approximately 100-120 calories per ball
- Fat: Approximately 7 grams per ball
- Carbohydrates: Approximately 10 grams per ball
- Protein: Approximately 3 grams per ball
More in Everyday Meals
Page not found | Mommy Made That

Cream Cheese Fruit Dip – Easy 4-Ingredient Recipe