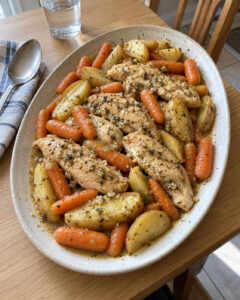
Easy Rotisserie Chicken

Introduction
Rotisserie chicken is a straightforward way to prepare a small whole chicken with juicy, tender meat and crisp skin. The outside carries a smoky, savory blend of paprika, smoked paprika, garlic powder, onion powder, salt, and black pepper. Olive oil coats the skin and gives the seasoning a surface to cling to, keeping the preparation focused on a short ingredient list and a careful setup.

Choose a whole chicken weighing about 3.5 to 4 pounds, with the skin intact. The cavity stays empty, and the outside is dried before any oil or seasoning is added. Those preparation details create a clean starting point for either cooking path: a rotisserie spit or an oven. The chicken can be centered on a spit so it rotates, or placed breast-side up in a cast iron skillet or small dish.
The recipe has two complete cooking options. The rotisserie path uses medium heat and a spit, while the oven path begins hotter and then continues at a lower setting. Both depend on the same signals: the skin is seasoned, the chicken is secured, and an instant-read thermometer confirms when the meat is ready. Resting follows cooking before the chicken is carved.
The result is a whole bird with crisp skin and tender meat that can be served immediately or removed from the carcass for later meals. The bones can also remain useful for chicken stock, and the cooked meat can move into chicken salad, sandwiches, soup, fajitas, or stew.
Ingredients
-
One small whole chicken weighing about 3.5 to 4 pounds, with the skin intact
-
Olive oil
-
Paprika
-
Smoked paprika
-
Garlic powder
-
Onion powder
-
Salt
-
Black pepper

The ingredients divide into three simple parts: the chicken, the coating, and the seasoning. The oil covers the outside, and the dry ingredients form the smoky, savory layer on the skin. The ingredient list does not require anything inside the cavity; keeping it empty is part of the preparation.
Paprika and smoked paprika establish the main character of the seasoning. Garlic powder and onion powder add the other savory notes, while salt and black pepper complete the mixture. The amounts can be adjusted to taste, but the ingredients remain the same. A favorite seasoning blend can replace the spices, and seasoned salt can provide a simpler seasoning choice.
Olive oil is the coating used here, although another oil or cooking spray can help the seasonings cling to the skin. Melted bacon grease is another coating option when a smoky flavor is wanted. If a seasoning mixture will be used later, the dry ingredients can be combined and kept in a jar before the chicken is prepared.
How to Make It
-
Combine the paprika, smoked paprika, garlic powder, and onion powder in a small bowl. Add salt and black pepper, then stir until the dry ingredients are evenly mixed. Keep the mixture ready beside the chicken so the coating can be applied after the skin is dried and oiled.
-
Remove the chicken from its packaging and check the cavity. Keep the cavity empty. Dab the skin dry with paper towels, working over the entire outside so the skin is not left damp before the oil is added.
-
Rub olive oil over the outside of the chicken. Cover the skin rather than leaving bare patches, because the oil provides the surface for the seasoning. Sprinkle and rub the spice mixture over the oiled skin until the chicken is seasoned all over.
-
Fold the wings behind the chicken. Tie the legs together with kitchen twine, keeping the bird compact and the cavity empty. Check that the seasoning remains on the skin and that the legs are secured before moving to the selected cooking method.
-
For the rotisserie method, center the chicken on a rotisserie spit. If using a grill rotisserie, use medium heat at 350°F. The chicken should be balanced on the spit so it can rotate while the skin cooks and the bird remains secured.
-
Cook the chicken for 18 to 22 minutes per pound. A 3.5-pound chicken takes 60 to 80 minutes as a guide. Use an instant-read thermometer to check the chicken, and continue until it reaches 165°F. The thermometer provides the doneness check before the chicken leaves the heat.
-
After the rotisserie chicken reaches the required temperature, turn off the heat and let it continue rotating without heat for 15 minutes. Remove the chicken from the spit after this period and prepare it for serving.
-
For the oven method, heat the oven to 450°F. Place the chicken breast-side up in a cast iron skillet or small dish. Keep the wings folded and the legs tied as the prepared chicken goes into the oven.
-
Roast the chicken for 12 minutes. Lower the oven to 350°F and continue cooking for 60 to 70 minutes. Check the chicken with an instant-read thermometer and continue until the reading reaches 165°F.
-
Remove the chicken from the oven and let it rest for 15 minutes before carving. The rotisserie and oven paths use different cooking setups, but both finish with the same thermometer check and a resting period before the meat is cut.

The preparation sequence matters even though the ingredient list is short. Drying comes before oil, oil comes before seasoning, and seasoning comes before the wings and legs are arranged. This order keeps the skin ready for the coating and makes it easier to season the outside evenly. The empty cavity is maintained from the initial check through the cooking setup.
The rotisserie path centers the chicken on a spit and allows it to rotate. The oven path places the chicken breast-side up in a skillet or small dish. Neither method changes the seasoning mixture or the securing steps. The selected setup only changes how the prepared bird cooks.
The thermometer is the clearest finishing check included with this preparation. Skin color and crispness describe the outside, but the thermometer confirms the point at which the chicken is ready. Check before removing the chicken from the heat, then follow the resting direction for the method in use.
Toppings and Serving
Serve the chicken as a whole seasoned bird or carve it into pieces. No additional topping is required. The crisp skin supplies the main exterior texture, and the tender meat provides the center of the serving. The paprika, smoked paprika, garlic powder, onion powder, salt, and black pepper keep the flavor smoky and savory without requiring another finishing mixture.

Carve the chicken after it has rested. Cutting after the resting period keeps the serving step separate from the cooking step and gives the bird time to finish its resting stage. Present the pieces with the crisp skin visible and the tender meat ready to serve.
The carcass has a separate use after carving. Remove the leftover meat from the bones before storage, then reserve the bones for chicken stock. This keeps the whole chicken useful beyond the first serving without adding another ingredient to the preparation.
Leftover meat can be directed into several meals. Chicken salad uses the cooked meat in a cold preparation, while chicken salad sandwiches turn that filling into a sandwich. Chicken soup, chicken fajitas, and chicken stew provide additional ways to use the same meat. These choices make the prepared chicken suitable for more than one meal while preserving the simple original seasoning.
Variations
The clearest variation is the cooking setup. A seasoned chicken can go onto a rotisserie spit, into the oven, or into an air fryer when the whole chicken fits inside the appliance. The rotisserie option centers the bird on a spit. The oven alternative places it breast-side up in a cast iron skillet or small dish. The air fryer option is limited by the size of the appliance, because the whole chicken must fit inside.
The seasoning can stay with the paprika mixture or change to a favorite seasoning blend. Seasoned salt is another simpler choice. When the paprika combination is used, paprika and smoked paprika provide the smoky character, while garlic powder and onion powder provide the remaining spice notes. Salt and black pepper finish that dry blend.
The coating can also change. Olive oil is the choice for covering the skin, but another oil or cooking spray can help the seasoning cling. Melted bacon grease can be selected when a smoky flavor is desired. Whichever coating is used, the preparation still calls for drying the skin first and applying the seasoning over the coated outside.
A make-ahead seasoning jar is a practical variation in preparation rather than a change to the chicken. Mix paprika, smoked paprika, garlic powder, onion powder, salt, and pepper in advance. Keep the dry mixture in a jar, then use it when the chicken is ready to be dried, coated, and seasoned.

The oven version is also an alternate presentation of the same seasoned whole chicken. Its cast iron skillet or small dish keeps the bird breast-side up, while the rotisserie version displays the chicken on a rotating spit. Both choices retain the intact skin, empty cavity, folded wings, tied legs, and thermometer check.
Storage and Make-Ahead
Remove leftover meat from the carcass before storing it. Place the meat in a covered container and refrigerate it for up to 4 days. Separating the meat from the bones makes the stored portion ready for later use and leaves the bones available for chicken stock.
Cooked chicken can be frozen for up to 3 months, and leftover meat can also be frozen for up to 4 months. Choose the period that matches the storage direction being followed, and keep the meat in a covered container.
The bones can be used to make chicken stock after the meat has been removed. The leftover meat can become chicken salad, chicken salad sandwiches, chicken soup, chicken fajitas, or chicken stew. Plan those uses before storing if that helps divide the meat, while keeping the stored chicken covered.
The seasoning can be made ahead even before the chicken is cooked. Combine paprika, smoked paprika, garlic powder, onion powder, salt, and pepper, then keep the mixture in a jar. When ready to prepare the bird, dry the skin, coat it with oil, apply the mixture, fold the wings, tie the legs, and keep the cavity empty.
Make-ahead work is therefore limited to the dry seasoning and the cooked leftovers described here. The chicken preparation still requires the intact skin to be dried and coated before cooking. After the selected cooking method reaches the required thermometer reading, follow the rest period before carving and storing any meat that will not be served.
FAQ
What size chicken works for this recipe?
Use one small whole chicken weighing about 3.5 to 4 pounds, with the skin intact. The cavity stays empty. If using an air fryer, the whole chicken must fit inside the appliance.
What does the seasoning taste like?
Paprika, smoked paprika, garlic powder, onion powder, salt, and black pepper create a smoky, savory seasoning for the skin. The chicken is coated with oil first so the dry mixture clings to the outside.
Why should the skin be dried?
The preparation calls for drying the skin before oil and seasoning are added. Drying gives the oil and seasoning a prepared surface, while the oil helps the mixture cling to the skin.
How is the chicken secured?
Fold the wings behind the chicken and tie the legs together with kitchen twine. Keep the cavity empty as the chicken is prepared for the spit or the oven.
How is doneness checked?
Use an instant-read thermometer. The chicken is ready when the reading reaches the required temperature. Check it before removing the bird from the rotisserie or oven.
Can another cooking method be used?
Yes. The detailed options are a rotisserie spit and an oven. An air fryer can also be used if the whole chicken fits inside it. The oven setup uses a cast iron skillet or small dish, while the rotisserie setup centers the chicken on a spit.
Can the seasoning be made ahead?
Yes. Mix paprika, smoked paprika, garlic powder, onion powder, salt, and pepper and keep the mixture in a jar. It can be ready when the chicken is dried and coated with oil.
How should leftovers be stored?
Remove the meat from the carcass, place it in a covered container, and refrigerate it for the recommended refrigerated period. Cooked chicken can also be frozen using one of the freezing periods described in the storage directions.
What can be done with the bones?
After the meat is removed, the bones can be used to make chicken stock.
How can leftover meat be used?
Use it for chicken salad, chicken salad sandwiches, chicken soup, chicken fajitas, or chicken stew. These are the available leftover uses for the cooked meat.
More in Uncategorized
Crock Pot Roast with Potatoes, Carrots, and Gravy
Easy Crockpot Chicken and Stuffing
Slow Cooker Beef Stew with Potatoes, Carrots, and Peas