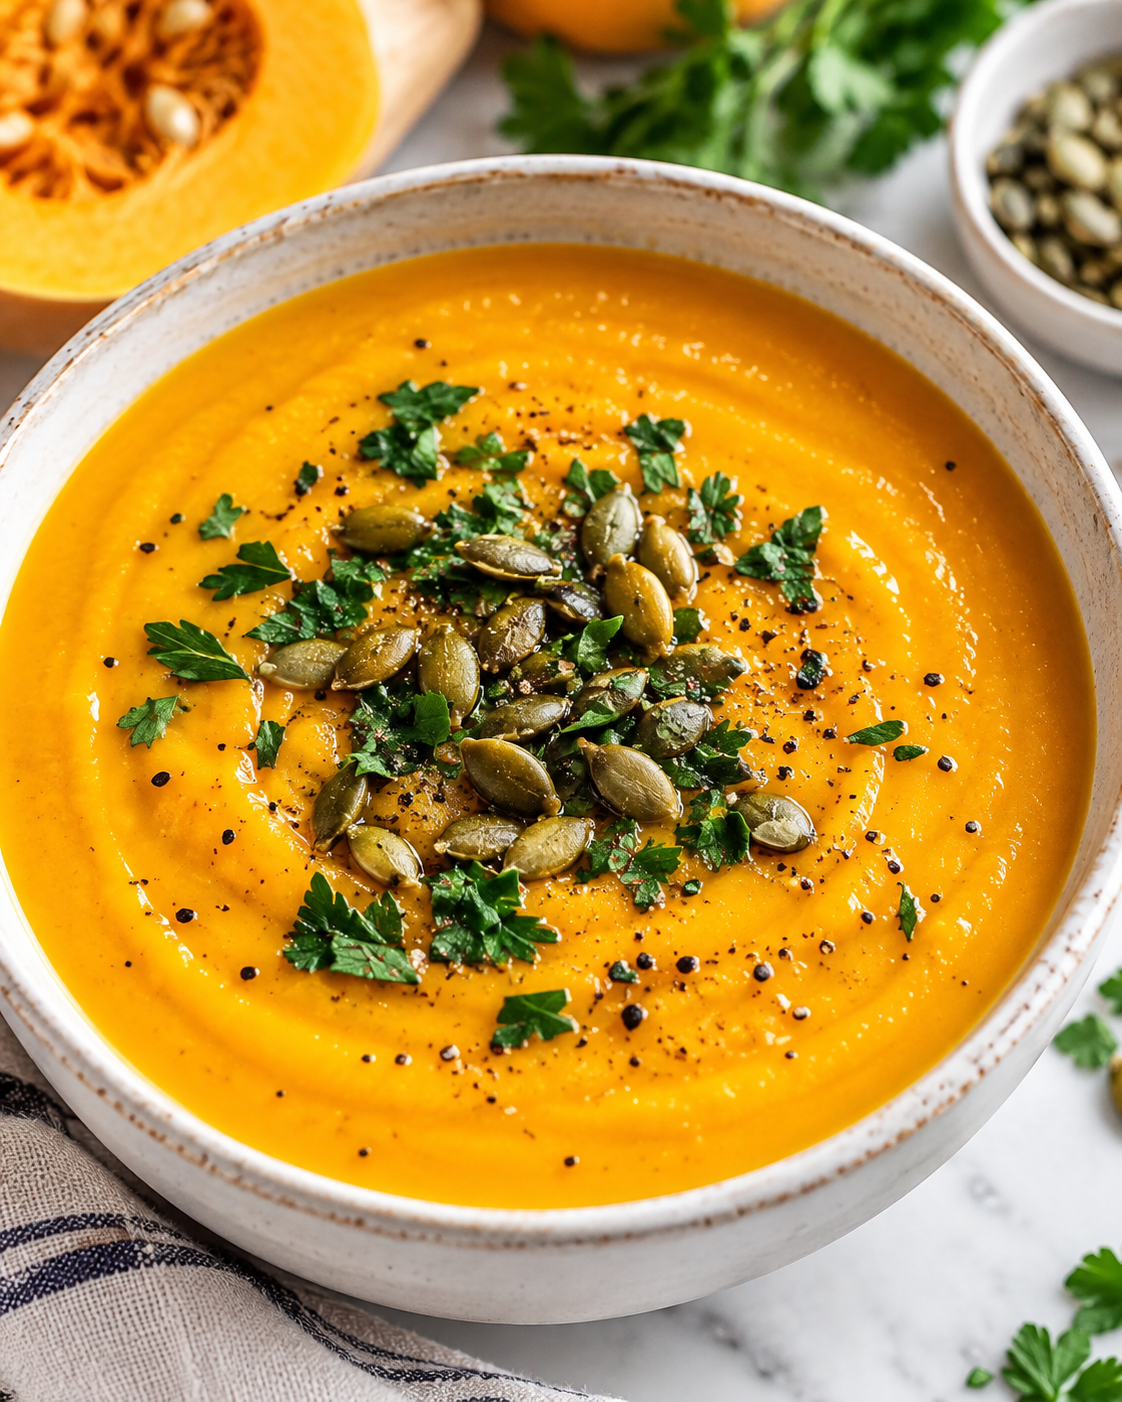
Roasted Butternut Squash Soup

Roasted butternut squash soup gets its depth from the oven rather than the stovetop. The squash and onion roast until their flavors concentrate, then join garlic, maple syrup, warm spices, and vegetable broth in the blender for a smooth, satisfying bowl.
The ingredient list is straightforward, but a few details make the process easier. A 3½-pound squash supplies the base, while roasting the onion alongside it adds a richer flavor. The broth amount is flexible, so you can blend with 3 cups first and add more until the soup reaches the consistency you want.
This recipe makes 4 servings and takes about 10 minutes of preparation plus 60 minutes of cooking. You can use a high-powered blender or an immersion blender, and the finished soup can be refrigerated for several days or frozen for longer storage.
For a dairy-free bowl, keep the recipe as written. If you tolerate dairy, butter or heavy cream can be blended in for extra creaminess. Optional toppings such as pepitas, parsley, and black pepper add a finished touch without changing the simple character of the soup.
Ingredients
-
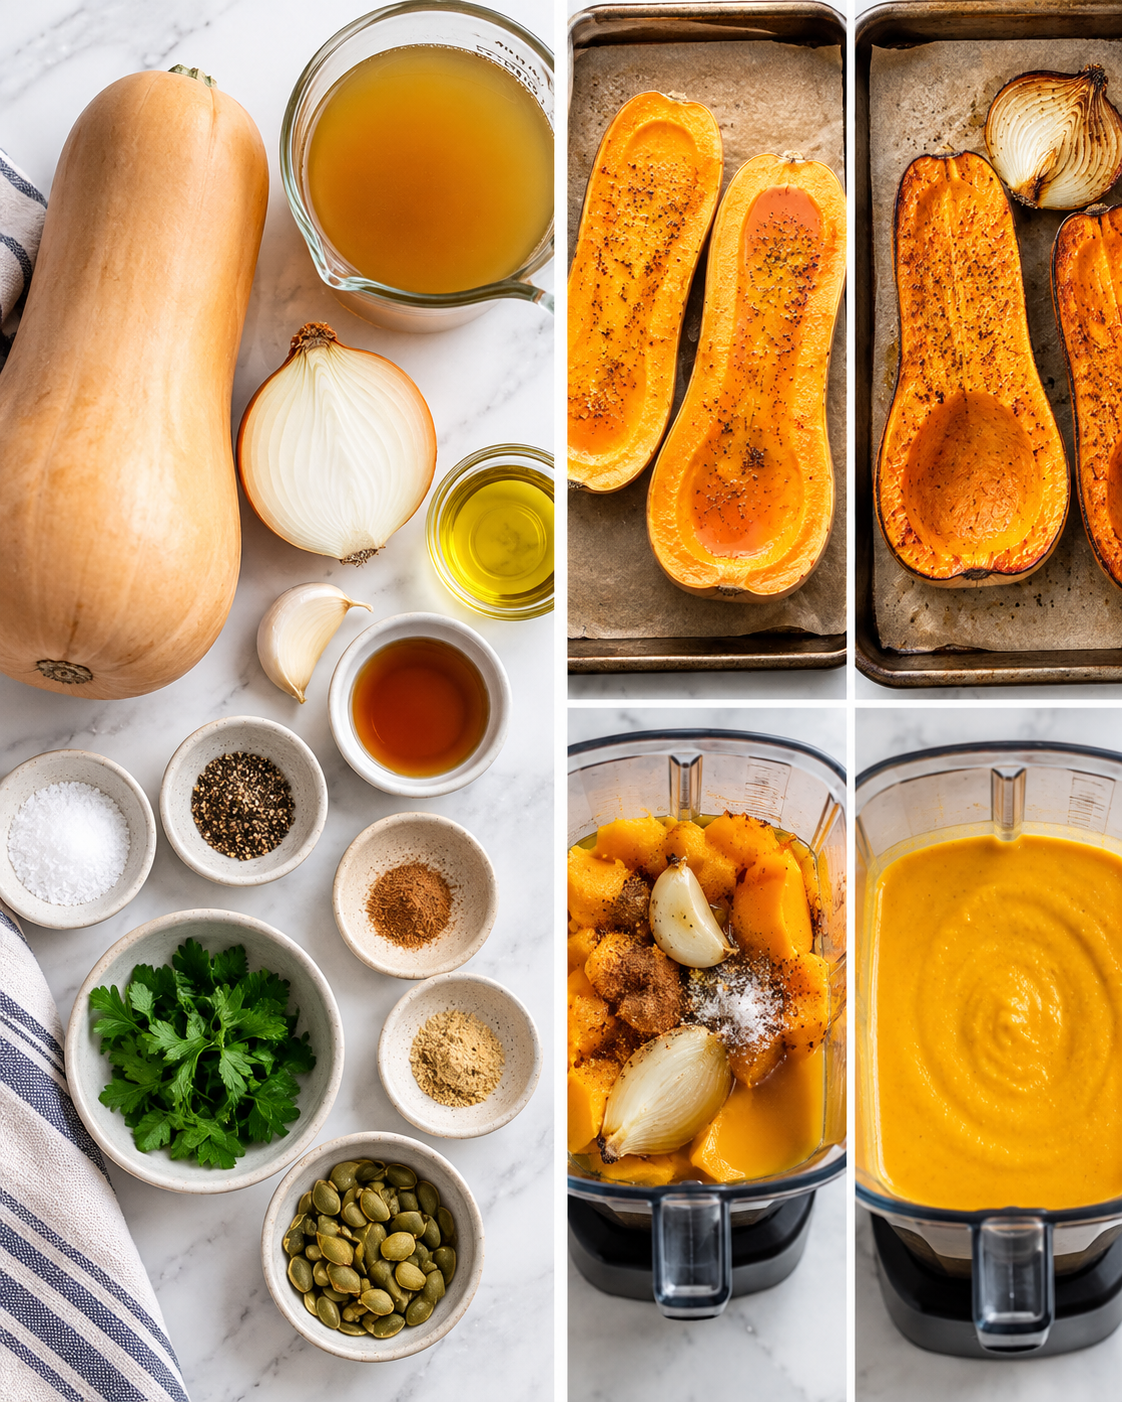
3 ½ pounds butternut squash
-
1 tablespoon avocado oil
-
1 small yellow onion (halved)
-
1 small garlic clove (peeled)
-
½ tablespoon maple syrup
-
1 teaspoon salt
-
freshly ground black pepper (to taste)
-
¼ teaspoon ground nutmeg
-
¼ teaspoon ground ginger
-
3 to 4 cups vegetable broth
-
Optional garnish: pepitas, parsley, and freshly ground black pepper, optional
The foundation is 3½ pounds of butternut squash. Look for one larger squash or weigh several smaller ones until the total reaches the amount needed. The squash is roasted before blending, so the ingredient list stays short while the finished soup develops a full flavor.
The garlic can be added raw, but high-powered blenders can make raw garlic taste especially pungent. If that is a concern, the garlic may be roasted on the sheet pan with the onion while wrapped in aluminum foil. The ingredient list still uses one small peeled clove; the alternate handling changes its intensity rather than adding another ingredient.
How to Make Roasted Butternut Squash Soup
Set up a heavy-duty baking sheet and a high-powered blender or immersion blender. Preheat the oven to 425°F (220°C). If the squash is difficult to cut, microwave it for 2 to 3 minutes first. This softens it enough to make the initial slicing easier.
-
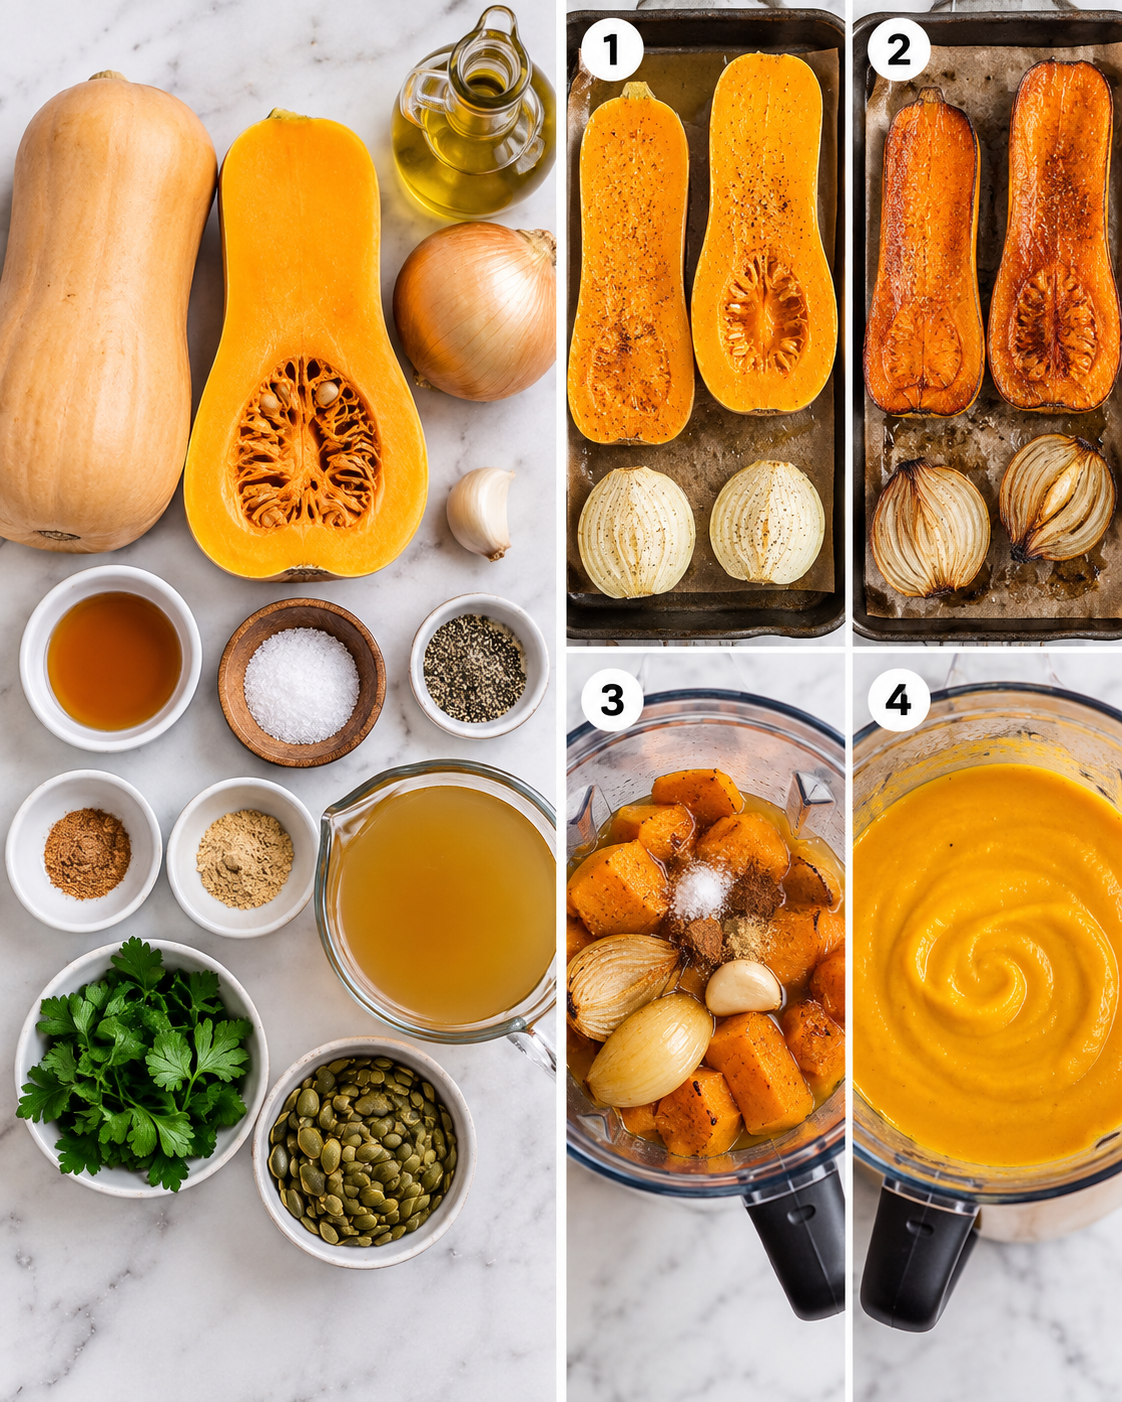
Slice the ends from the butternut squash. Stand it on one end and carefully cut it in half lengthwise. Use a spoon to remove the seeds and membrane.
-
Place the squash halves on a baking tray with the cut sides facing up. Coat them with the avocado oil and sprinkle with salt and pepper. Turn the halves over so the cut sides face down.
-
Roast the squash for 60 minutes. After the first 30 minutes, spread a little oil over the cut side of the halved onion and place it on the baking tray, cut side down. Continue roasting for the remaining 30 minutes.
-
Remove the tray from the oven. Once the squash is cool enough to handle, scoop out the flesh with a large spoon and transfer it to the blender. Discard the onion’s outer layer and add the onion to the blender.
-
Add the garlic, maple syrup, salt, nutmeg, ginger, and 3 cups of vegetable broth. Blend on high for 1 to 2 minutes, until creamy. Add more broth if you want a thinner consistency.
-
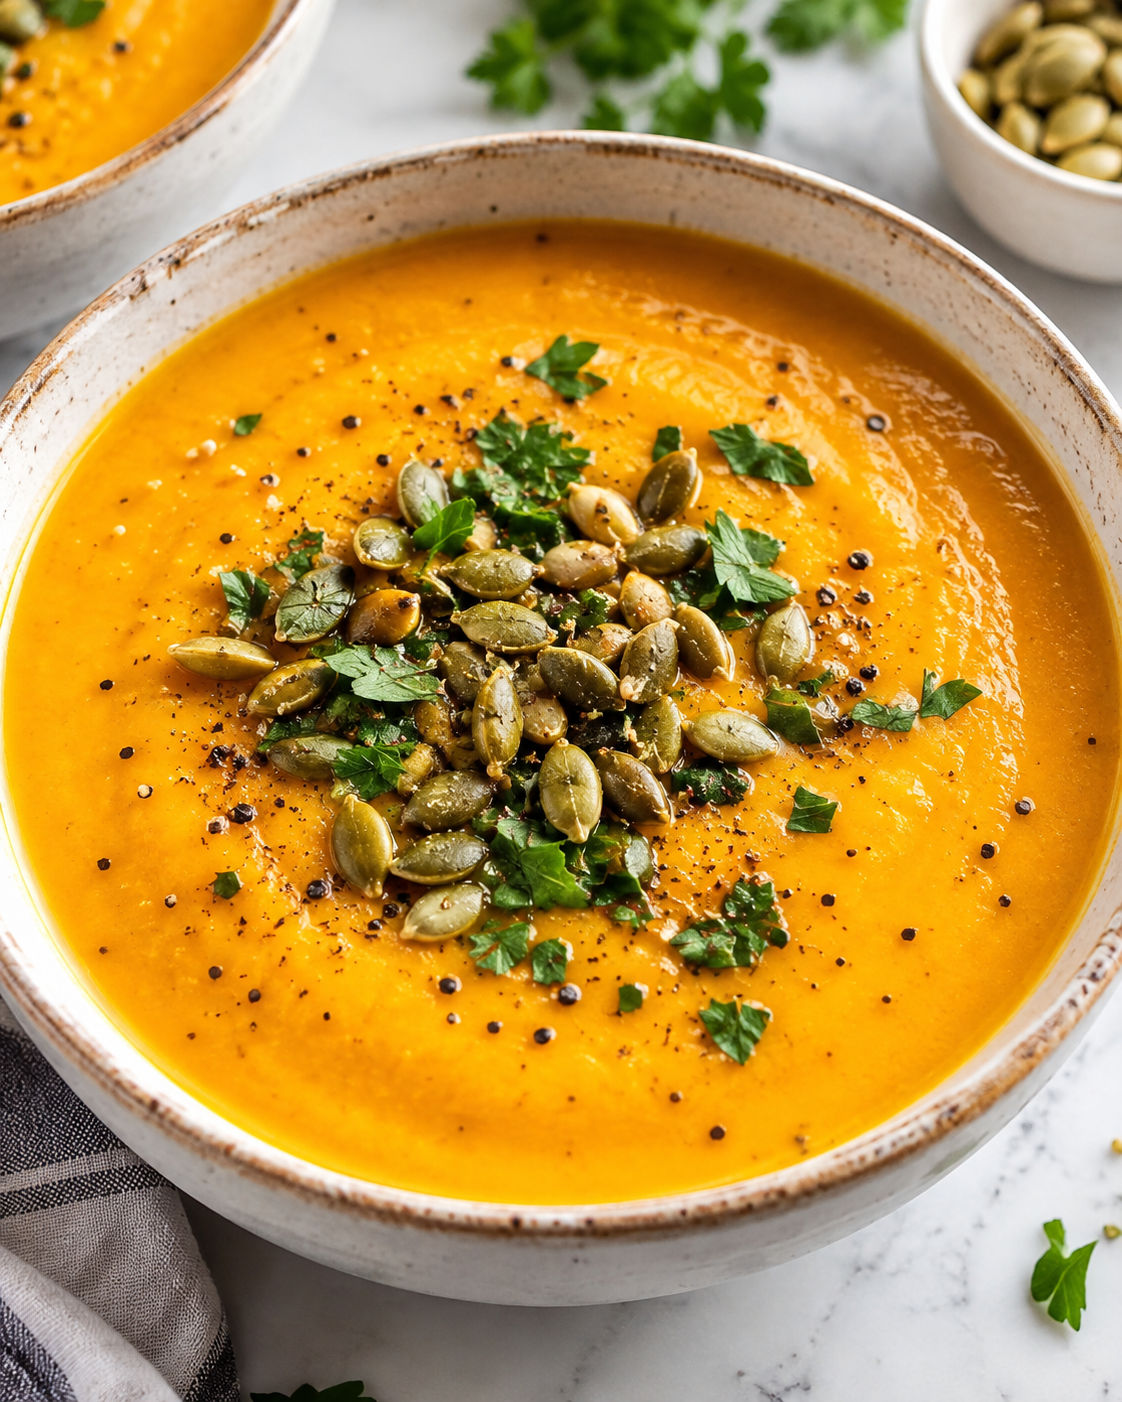
Taste the soup and add more salt and pepper if needed. Pour it into serving bowls and add the optional pepitas, parsley, and black pepper.
The order matters: the squash and onion are roasted first, and the remaining ingredients are added only after the roasted vegetables reach the blender. If using an immersion blender, blend the ingredients together until creamy. For extra richness, add a tablespoon or two of butter or heavy cream during blending; dairy-free options include coconut milk or ¼ cup soaked raw cashews.
Variations
The soup can remain dairy-free and still be blended until creamy. For a richer version, add heavy cream or a tablespoon or two of butter while blending. If you prefer to avoid dairy, use coconut milk or add ¼ cup soaked raw cashews instead. For another recipe idea, explore Healthier Slow Cooker Creamy Tortellini Vegetable Soup..
The toppings can also change the finished bowl. Keep the listed pepitas, parsley, and black pepper, or use fresh thyme, sage, or chives. For more crunch, choose toasted almonds, crispy bacon bits, roasted chickpeas, or crispy shallots. These options are topping variations rather than changes to the roasted squash base. For another recipe idea, explore Baked Potato Soup.
Serving Suggestions
This recipe makes 4 servings. Pour the blended soup into serving bowls and, if desired, finish each bowl with pepitas, parsley, and freshly ground black pepper. Fresh thyme, sage, or chives are additional supported herb options, while toasted or crispy toppings can provide contrast against the creamy soup. You can also browse Creamy Broccoli Cheddar Soup – The Chunky Chef for another option.
Storage and Make-Ahead
For make-ahead storage, let the soup cool to room temperature, then transfer it to an airtight container. Refrigerated leftovers keep for 4 to 5 days, making the soup suitable for reheating throughout the week. For another make-ahead idea, see Easy Broccoli Cheddar Soup.
For longer storage, portion the soup into freezer-safe containers or silicone molds. Silicone molds work well for single servings, and the soup can be frozen for up to 3 months. When you are ready to serve it, thaw the soup in the refrigerator overnight, then reheat it gently on the stovetop or in the microwave. If the texture has tightened during storage, add a splash of broth or water to loosen it. For another make-ahead idea, see Best Tomato Soup Recipe.
Why You’ll Love It
Roasting gives this butternut squash soup its main point of difference. Instead of relying on a long simmer to build the base, the squash and onion are cooked together in the oven before they are blended. That keeps the process focused and makes the roasted vegetables the center of the flavor. For more inspiration, see Easy Chicken and Rice Soup.
The recipe is also flexible at the blending stage. Start with 3 cups of vegetable broth, then add more to reach the consistency you prefer. The soup serves 4, can stay dairy-free, and offers both refrigerated and frozen storage options for meals later in the week or farther ahead. Another recipe you may want to try is Easy Spicy Baked Potato Soup..
Pro Tips for Success
A few handling choices make the process more consistent: For another recipe idea, explore Loaded Baked Potato Soup –.
-
If the squash is hard to cut, microwave it for 2 to 3 minutes before slicing it lengthwise.
-
Use a heavy-duty baking sheet. A sturdier tray is recommended because it is less likely to bend or warp while cooking.
-
Add the onion after the squash has roasted for 30 minutes. This gives the onion its own 30 minutes on the tray instead of exposing it to the full cooking time.
-
Keep the squash cut side down for the 60-minute roast after seasoning and oiling it.
-
Wait until the squash is cool enough to handle before scooping out the flesh.
-
Blend with 3 cups of broth first. Add the remaining broth gradually so you can control the final consistency.
-
Taste after blending and adjust the salt and pepper only at that point.
Garlic deserves special attention when using a high-powered blender. Its blade velocity can amplify the pungency of raw garlic, making the small clove taste much stronger. If you are sensitive to that flavor, wrap the peeled clove in aluminum foil and roast it on the sheet pan with the onion before blending. For more inspiration, see The Best Tomato Bisque Soup Recipe: A Restaurant-Style Recipe – Munchkin Time.
Flavor and Texture
The finished soup is creamy from blended roasted squash and onion, without requiring cream. Its flavor is warm and slightly sweet, with maple syrup, nutmeg, and ginger shaping the profile. Vegetable broth carries those flavors into a smooth soup, while black pepper and salt keep the blend balanced.
Roasting the onion alongside the squash contributes a richer, caramelized note. The garlic adds another layer, although its effect depends on how it is handled: raw garlic can be notably pungent in a high-powered blender, while roasting it softens that intensity. The broth amount controls the texture, so 3 cups creates the starting point and additional broth loosens the soup when desired.
The optional toppings change the experience at the surface of the bowl. Pepitas and other toasted or crispy additions bring crunch, while parsley and other fresh herbs add a contrasting finishing note. The soup itself remains the creamy element beneath those toppings.
Troubleshooting
If the soup tastes much more strongly of garlic than expected, the high-powered blender may have amplified the pungency of the raw clove. Roast the garlic on the sheet pan with the onion, wrapped in aluminum foil, before blending it with the other ingredients.
If the blended soup is thicker than you want, add more vegetable broth. If its texture tightens after refrigeration or freezing, add a splash of broth or water while reheating. For a consistency that is easier to control from the start, begin blending with 3 cups of broth and add more gradually.
Frequently Asked Questions
What is the best way to prepare roasted butternut squash soup?
Roast the halved, seeded squash cut side down, add the halved onion after 30 minutes, then blend the cooked squash and onion with the garlic, maple syrup, seasonings, and vegetable broth.
How do I know when the soup is ready?
The soup is ready after the roasted squash and onion have been blended on high for 1 to 2 minutes until creamy. Taste it afterward and add more salt or pepper if needed.
What temperature should I use?
Roast the squash and onion at 425°F (220°C).
How long does roasted butternut squash soup take to make?
The preparation time is 10 minutes and the cooking time is 60 minutes, for a total time of about 70 minutes.
What equipment do I need?
Use a heavy-duty baking sheet and either a Vitamix blender, another high-powered blender, or an immersion blender.
Can I make it ahead of time?
Yes. Cool the soup to room temperature, transfer it to an airtight container, and refrigerate it for 4 to 5 days. It can also be frozen for up to 3 months.
How should I store it for longer?
Use freezer-safe containers or silicone molds for single servings. Thaw the soup in the refrigerator overnight, then reheat it gently on the stovetop or in the microwave.
Nutrition
Nutrition per serving:
-
serving size: 1 serving
-
calories: 292 kcal
-
fat: 9 g
-
saturated fat: 4 g
-
carbohydrates: 54 g
-
fiber: 8 g
-
sugar: 13 g
-
protein: 4 g
-
sodium: 1589 mg
-
cholesterol: 15 mg

Butternut squash soup is flavorful and easy to make by roasting squash and onion, then blending with remaining ingredients
- Prep Time: 10 minutes
- Cook Time: 1 hour
- Total Time: 1 hour 10 minutes
- Yield: 4 servings 1x
- Category: Soup
- Cuisine: American
Ingredients
- 3 ½ pounds butternut squash
- 1 tablespoon avocado oil
- 1 small yellow onion (halved)
- 1 small garlic clove (peeled)
- ½ tablespoon maple syrup
- 1 teaspoon salt
- freshly ground black pepper (to taste)
- ¼ teaspoon ground nutmeg
- ¼ teaspoon ground ginger
- 3 to 4 cups vegetable broth
- Optional garnish: pepitas, parsley, and freshly ground black pepper
Instructions
- Slice it in half and remove the seeds. Preheat your oven to 425°F (220C). Slice the ends off the butternut squash. Stand the butternut squash on end and carefully slice it in half lengthwise. Then, Use a spoon to remove the seeds and membrane. Pro tip: the butternut squash is easier to slice through if you microwave it for 2 to 3 minutes.
- Season and roast. Transfer the butternut squash to a baking tray cut side up, coat with oil and sprinkle with salt and pepper. Then flip the butternut squash over so the cut side is down and roast for 60 minutes.
- Add the onion. After 30 minutes, spread a little oil on the cut side of the onion and add it to the baking tray, cut side down. Continue cooking for another 30 minutes, then remove the baking tray from the oven.
- Blend the soup. Once the butternut squash is cool enough to handle, use a large spoon to scoop out the flesh and transfer it to a high-powered blender. Discard the outer layer of the onion and then add the onion to the blender along with the garlic, maple syrup, salt, nutmeg, ginger, and vegetable broth. Start with 3 cups of vegetable broth and add more to achieve your desired consistency. Blend on high for 1 to 2 minutes, until creamy. Taste the soup and add more salt and pepper if needed. Optional: while this is a dairy-free recipe, if you do tolerate dairy, adding just a tablespoon or two of fresh butter when you're blending definitely boosts the creaminess factor.
- Serve. Pour the soup into serving bowls. If you'd like, garnish the top with pepitas, parsley and black pepper.
Notes
To store for the week: Any leftover soup can be stored in an airtight container in the fridge for 4 to 5 days. Perfect for a quick and delicious reheatable meal throughout the week! To freeze for later: It’s always a good idea to freeze leftovers or a second batch to enjoy throughout the winter months. Just store it in a freezer-safe container (like these Weck jars), and it will keep for up to 3 months. Notes about the garlic. When I originally made this soup recipe decades ago I used an older, regular blender or immersion blender. Raw garlic wasn’t as much of an issue in those blenders as it is now in high-powered blenders. In fact, high-powered blenders are so powerful (due to the velocity of the blades) that they actually increase and amplify the pungency of the raw garlic, making it seem like you’ve added way more garlic to the soup than you have (I’ve spoken to Vitamix about this directly). So my original recipe morphed from 3 raw garlic cloves (as shown in the video), to 1 small raw garlic clove, which many of you love! But if you’re sensitive to garlic, I do recommend roasting the garlic on the sheet pan with the onion. Just wrap it in some aluminum foil. Roasting the garlic helps to mute that pungency, while still letting you enjoy its wonderful flavor! Butternut squash soup is naturally ultra-creamy (without any cream). But if you do tolerate dairy, adding just a tablespoon or two of heavy cream or butter when you’re blending definitely boosts the creaminess factor. For dairy-free options, you can add coconut milk or ¼ cup soaked raw cashews. When it comes to roasting veggies, I always recommend a heavy duty baking tray so it doesn’t bend and warp while cooking. I’m a massive fan of my Vitamix blender, but if you’re looking to buy one make sure to check out my Vitamix Comparison post.
Make it ultra-creamy. Just add a splash of heavy cream or a tablespoon or two of butter when blending. For a dairy-free option, use coconut milk or ¼ cup soaked raw cashews. Garlic tip. I’ve revised this recipe over the years due to the increased use of high-powered blenders and your feedback. See the notes in the recipe card below for more details. Toppings make it extra special. Try fresh herbs like parsley, thyme, sage, or chives, and add some crunch with pepitas, toasted almonds, crispy bacon bits, roasted chickpeas, or crispy shallots.
Simmering
Let the soup cool to room temperature, then transfer it to an airtight container. It will keep in the fridge for 4 to 5 days. For longer storage, pour the soup into freezer-safe containers or silicone molds (for single servings) and freeze for up to 3 months. When you’re ready to enjoy it again, thaw it in the fridge overnight and reheat gently on the stovetop or in the microwave, adding a splash of broth or water if needed to loosen the texture.
4 servings
Nutrition
- Serving Size: 1 serving
- Calories: 292 kcal
- Sugar: 13 g
- Sodium: 1589 mg
- Fat: 9 g
- Saturated Fat: 4 g
- Carbohydrates: 54 g
- Fiber: 8 g
- Protein: 4 g
More in Uncategorized
Crock Pot Roast with Potatoes, Carrots, and Gravy
Easy Crockpot Chicken and Stuffing
Slow Cooker Beef Stew with Potatoes, Carrots, and Peas