Sheet Pan Nachos

The quick scoop: Sheet pan nachos are all the classic goodness of nachos, baked all at once on a big tray. You layer seasoned ground beef and gooey melted cheese over a sturdy bed of chips, so every single chip gets covered—no lonely naked chips here! Ready in about 25 minutes, this one-pan wonder feeds a crowd and saves you from a mountain of dishes. The secret? Two layers of toppings make sure each chip gets its fair share of melty love.
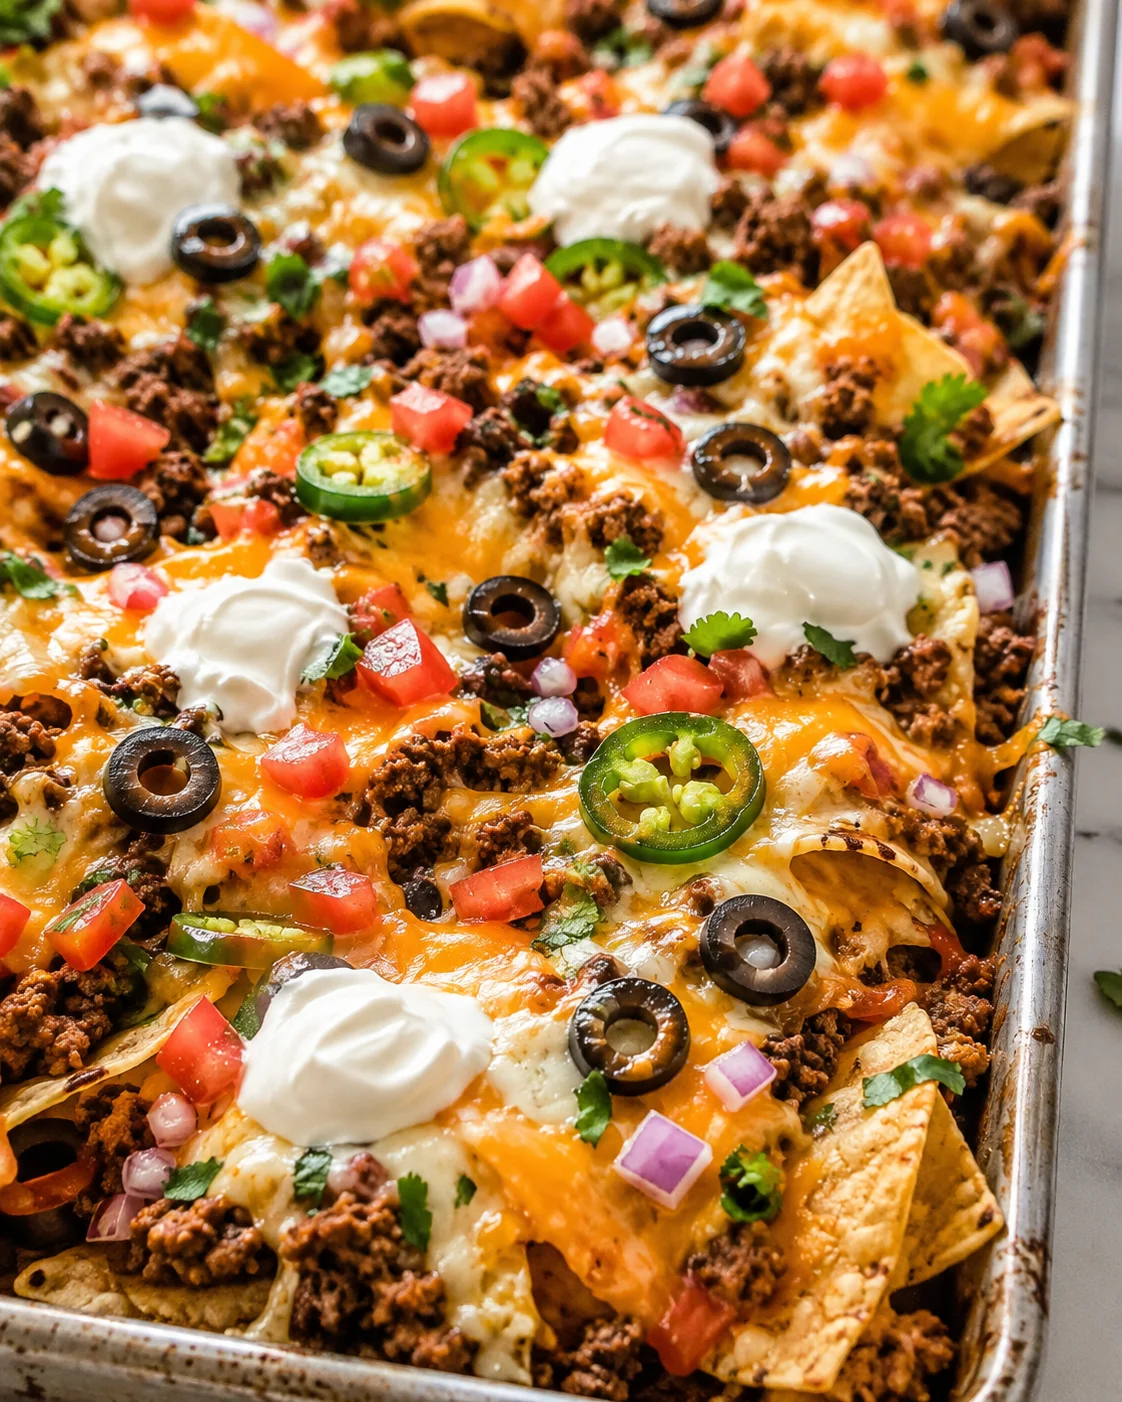
- Only the best freshly shredded cheese and durable chips will do for these
- On your table in about 25 minutes
- Feeds a crowd with just one pan to clean afterward
- Perfect for game nights, movie marathons, or last-minute dinners
I used to make nachos in the microwave or layered on a round pizza stone, but I always hit the same snag: the “naked chip” curse. You know the drill—the top layer is tasty and cheesy, but the bottom chips are dry and sad. After testing and tweaking, I found the best fix is using a large rimmed sheet pan with a two-step layering system. This way, every chip gets some love with melted cheese, crispy edges, and zero dry bottoms.
Looking to shake up your nacho game? Give my Air Fryer Nachos or Totchos Tater Tot Nachos a try — they’re loaded with flavor and tons of fun for your next get-together.
Storage:
- Allow nachos to cool fully before storing.
- Keep in an airtight container in the fridge for up to 2 days.
- Reheat in a 350°F oven for roughly 10 minutes to keep those chips nice and crisp.
- Store fresh toppings like sour cream and guacamole separately to keep them fresh.
- Add fresh toppings after reheating for best texture and flavor.
Nutrition Info
Sheet pan nachos take all the best parts of classic nachos—melted, gooey cheese, seasoned beef, and crunchy chips—and turn it into an easy meal that feeds a crowd without fuss. This recipe solves the all-too-common “naked chip” problem by layering everything twice on a rimmed baking sheet, making sure every chip gets evenly covered and crispy rather than soggy.
Keep reading and I’ll walk you through the key ingredients that really matter (those sturdy restaurant-style chips and freshly shredded cheese are absolute game-changers), how to cook and season the meat perfectly without adding grease, and the exact layering and baking (or broiling) steps to get that perfect melt and crispness. The whole pan comes together quickly, delivers big flavor, and keeps cleanup easy.
You’ll find a full list of ingredients and step-by-step instructions below, plus handy tips for swapping out ingredients (if you want to go vegetarian or try different proteins), storage and reheating ideas, and answers to FAQs so your sheet pan nachos come out just right every time.
- Time: Ready in around 25 minutes—from start to snacks on the table.
- Serves: About 8 hungry folks—perfect for game days or casual dinner parties.
- Texture: Crispy, sturdy chips with cheese melted evenly and no soggy bottoms.
- Cleanup: One rimmed baking sheet means easy serving and little mess to clean.
- Customizable: Swap in your favorite proteins or veggies, and add Tex-Mex toppings for any crowd.
Why You’ll Love It
This recipe for sheet pan nachos is a fast, crowd-pleaser that nails restaurant-worthy melty cheese and crispy, sturdy chips with hardly any fuss. The two-step layering process guarantees every chip scores some cheesy coverage and avoids those sad soggy bottoms. You’ll have dinner on the table in about 25 minutes using just one pan, making serving and clean-up a cinch. Plus, it’s super flexible — swap the protein or go vegetarian to match what your family loves, and finish with a bright, homemade topping like fresh peach jalapeño salsa.
- Feeds a big group with just one baking sheet — ideal for game days or casual dinners; pair it with Baked Beef Tacos for an easy spread
- Fast to prepare — most of your time goes to browning the beef; the oven handles the rest
- No soggy chips — lean, well-drained beef and two cheese layers keep things crisp
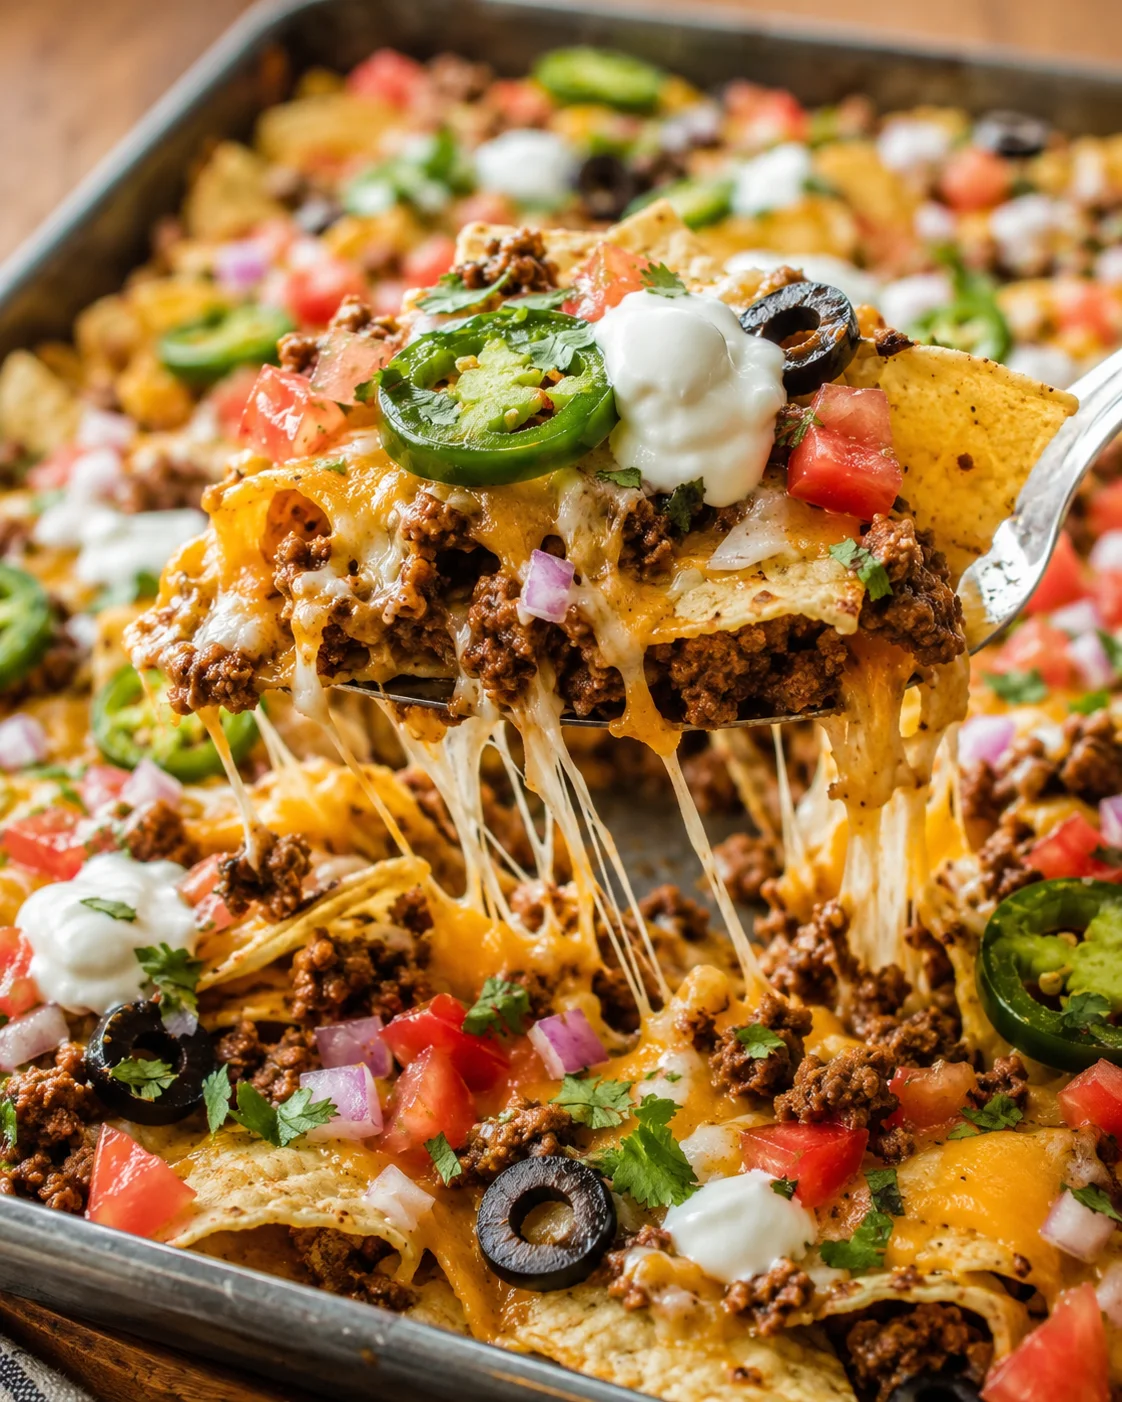
- Perfectly gooey cheese — freshly shredded melts better for that picture-perfect pull
- Totally customizable — toss in your favorite proteins, or turn it vegetarian with beans and veggies
Ingredients to Get Right
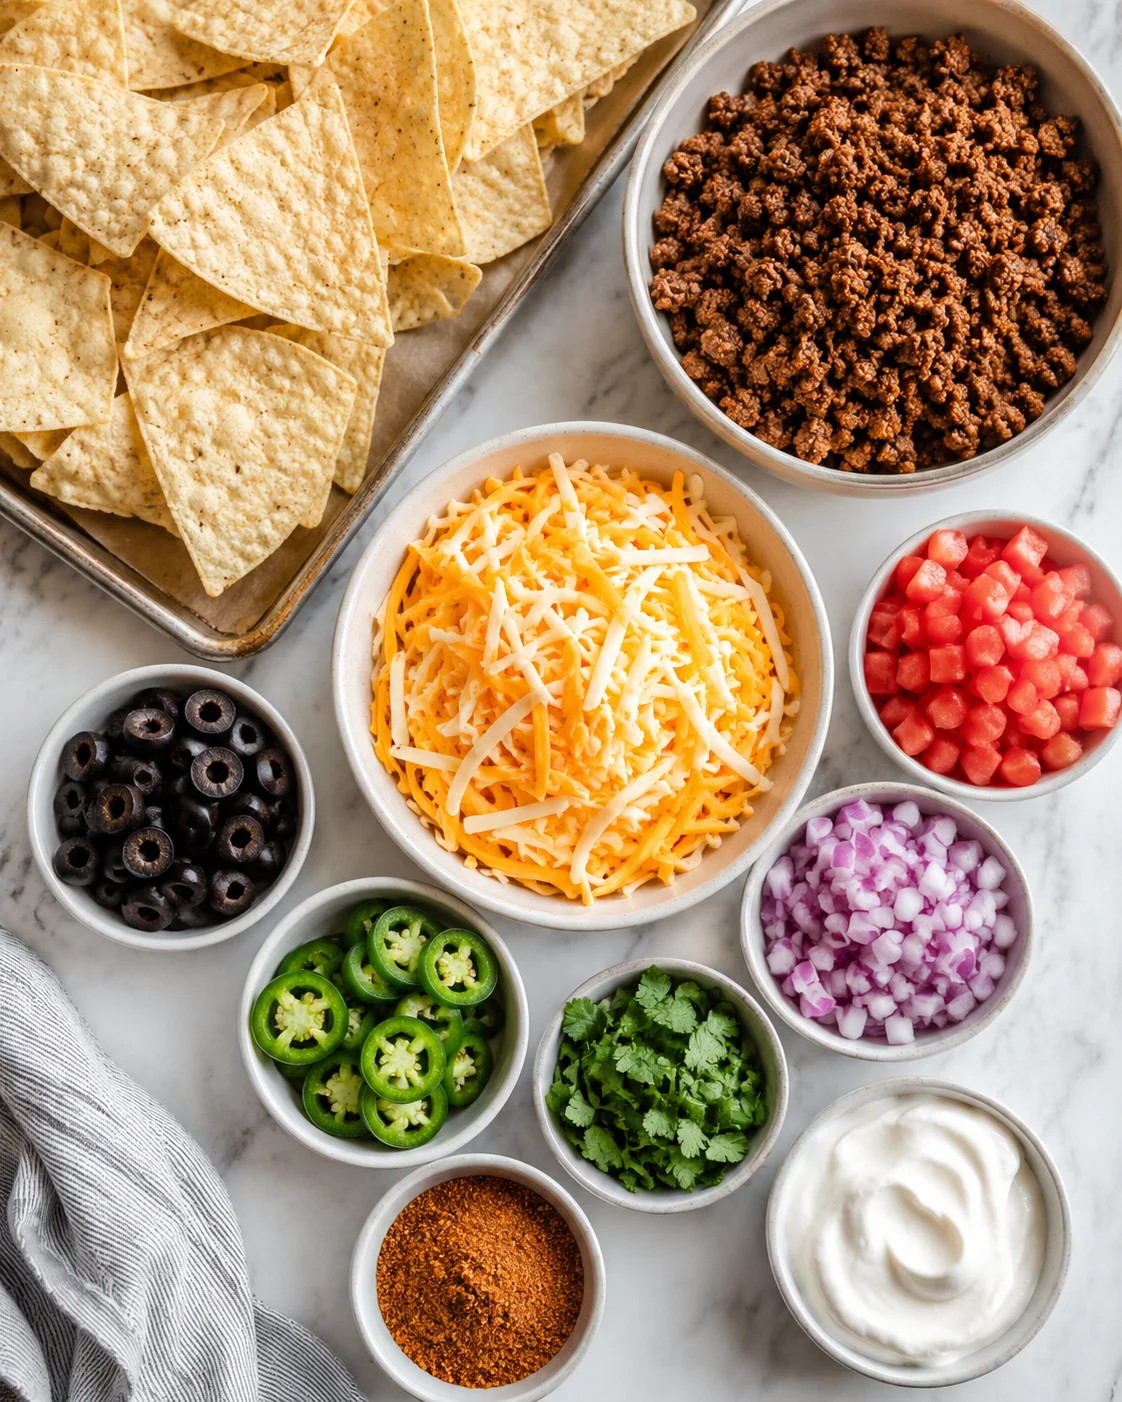
- 1 Pound lean ground beef 85/15 or 90/10
- 1 Package Taco Seasoning
- 1 13-ounce Bag Tortilla Chips thick, restaurant-style recommended
- ½ Cup Water
- Roma tomatoes seeded and diced
- ½ Cup Red Onion
- Fresh Cilantro
- 3 cups freshly shredded cheese Cheddar, Monterey Jack, or Colby Jack
- Jalapenos
- Black Olives
- Sour Cream
Layering and Baking Method
- Preheat oven to 400°F (200°C) and line a large rimmed baking sheet with foil or spray with nonstick spray.
- Shred cheese if using a block rather than pre-shredded.
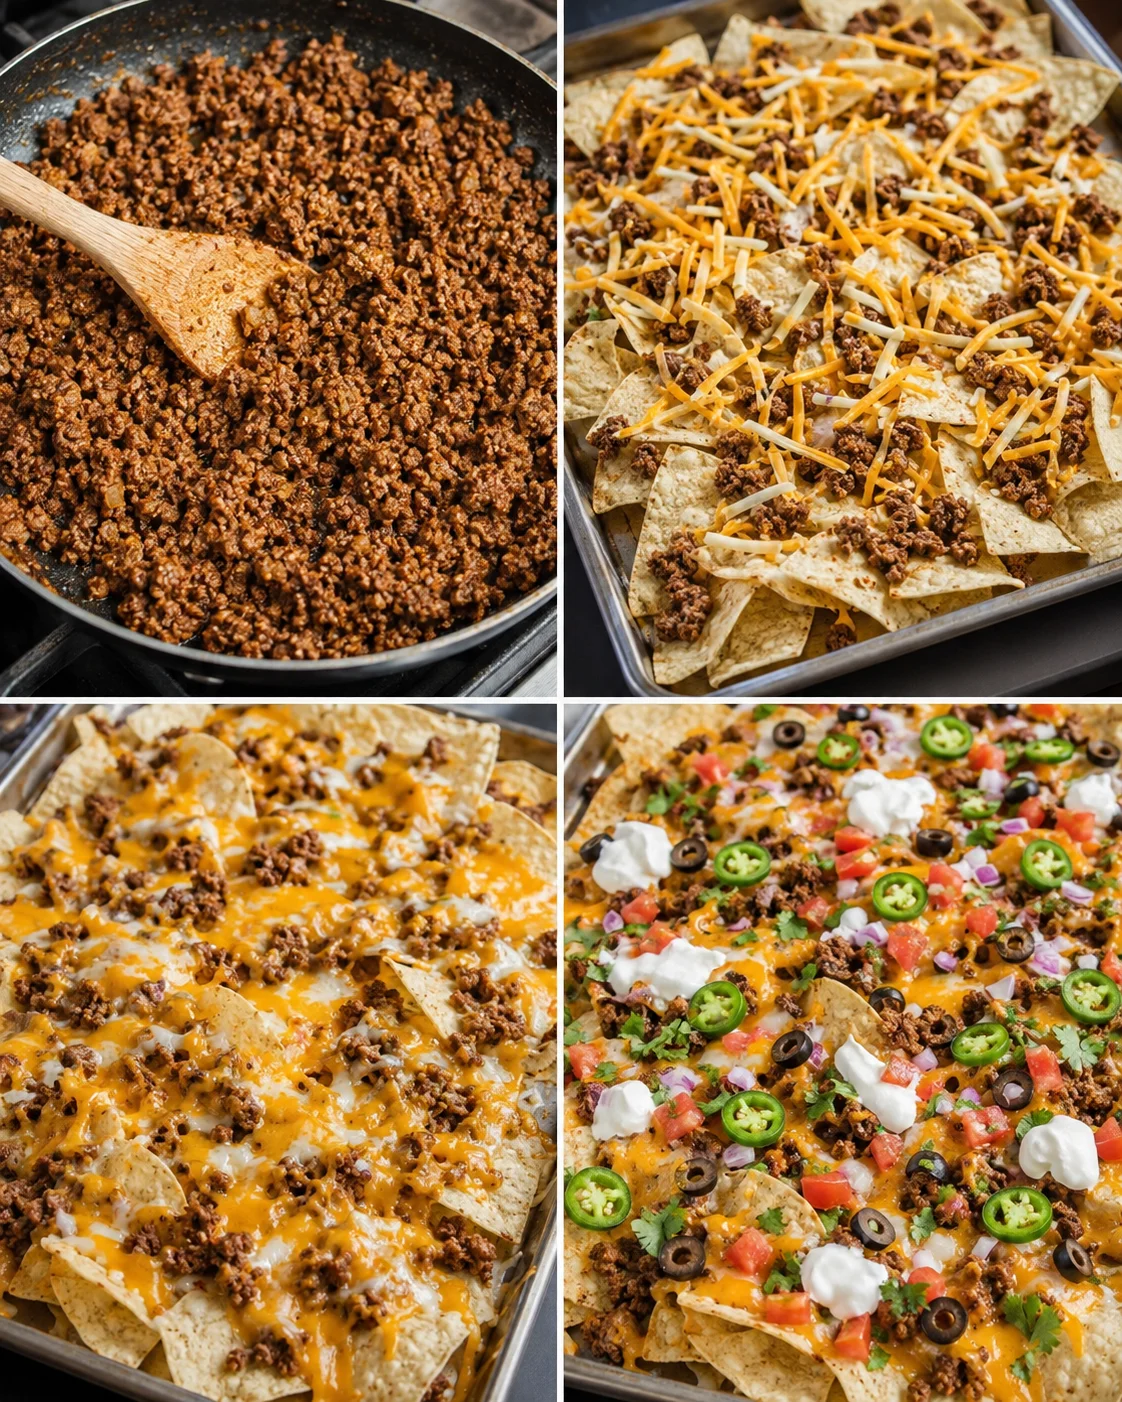
- Brown ground beef in a skillet over medium heat and drain off fat thoroughly.
-
Stir in taco seasoning and water; simmer 3–5 minutes until the sauce thickens and clings to the meat.
- Spread half the tortilla chips evenly over the prepared sheet pan.
- Sprinkle half the beef mixture over the chips, then scatter half the shredded cheese over the beef.
- Add the remaining chips in an even layer, then top with the remaining beef and remaining shredded cheese.
- Bake at 400°F for 5–8 minutes (or broil on high 1–2 minutes) until the cheese is melted and bubbly and chip edges are toasted—watch closely if broiling.
- Immediately top with diced tomatoes, diced red onion, sliced jalapeños, black olives, and chopped cilantro; serve with sour cream and guacamole on the side or dolloped on top.
Tips for Crispy, Melty Nachos
- Wet Toppings Go Last: Don’t add cold, wet toppings like salsa or sour cream before baking — they’ll steam the chips and turn them soggy. Always add fresh toppings after baking for crunch and color.
- Even Cheese Distribution: Avoid stacking chips in the center only. Spread them across the pan so each chip has a chance at cheesy goodness. For a quick visual on pan layout and layering, see our step-by-step Sheet Pan Ground Beef Nachos.
Simple Swaps and Add-Ins
- Change up the Protein: Switch the ground beef for shredded rotisserie chicken tossed in BBQ sauce for a fun flavor twist, or ground turkey if you want something leaner. For a bright, herby kick, try diced cilantro-lime chicken on top.
- Vegetarian Option: Skip the meat and load up on black beans, corn, and bell peppers; for extra depth, roast the veggies first using a simple sheet-pan roasting method. Make sure to rinse and dry beans well so they don’t add extra moisture.
- Add Tex-Mex Flair: Toss on corn salsa, pickled red onions, or a drizzle of lime crema after baking to ramp up the flavor.
Make-Ahead and Leftover Care
Make-Ahead Magic
You can cook the seasoned taco meat up to 2 days ahead and keep it in the fridge, and any extra meat is fantastic tucked into Easy Stuffed Bell Peppers. When ready to eat, just layer chips, meat, and cheese on the pan and bake. The heat will revive the meat and melt the cheese perfectly.
Storing & Reheating Leftovers
- In the fridge: Nachos are best fresh, but leftovers can be stored in an airtight container for up to 2 days. Keep in mind, chips will soften over time; if that happens, salvage the seasoned beef and fixings by simmering them into Easy Taco Soup.
- Reheating tips: Avoid microwaves—they turn nachos rubbery. Instead, spread leftovers on a baking sheet and bake at 400°F for 5-8 minutes. This crisps chips back up and revives the cheese.
If you’ve given this Sheet Pan Nachos Recipe a try, or any other recipe on my site, I’d love if you dropped a rating and shared your thoughts below!
Questions About Crisp, Melty Nachos
- What kind of tortilla chips should I pick? Always go for thick, sturdy corn chips—restaurant style is best. Thin, delicate chips tend to crack or get soggy under toppings.
- Do I really need to shred cheese myself? Yes! Freshly shredded cheese melts smooth and gooey. Pre-shredded cheese has anti-caking agents that stop it from melting right.
- How do I keep nachos crisp, not soggy? Drain the fat well from your beef, use lean ground meat, layer your chips and toppings in two even layers, and always add wet toppings like sour cream or salsa only after baking—or serve creamy dips on the side, like Fried Pickle Dip.
- Can I make this vegetarian? Definitely! Skip the meat and add well-rinsed, drained black beans, corn, peppers, or a plant-based meat substitute. Avoid ingredients that add extra moisture.
- Can I prep in advance? You can cook taco meat up to 2 days ahead and store it chilled. Keep your fresh toppings separate and assemble just before baking to keep things crisp.
- What’s the best way to reheat leftovers? Skip the microwave to avoid rubbery chips. Reheat on a baking sheet in a hot oven (400°F for about 5-8 minutes) to crisp everything back up. Add fresh toppings afterward.
- Broil or bake — which should I choose? Baking at 400°F for 5-8 minutes heats everything evenly and crisps edges. Broiling melts cheese quickly in 1-2 minutes but watch closely to avoid burning.
- How many servings does this recipe make and how long does it take? This feeds about 8 hungry people and takes around 25 minutes total (7 minutes prep, 8-10 minutes baking or broiling).
- Can I freeze these nachos? It’s not a great idea to freeze nachos once assembled or cooked because the chips get soggy. However, you can freeze the cooked taco meat separately for future meals—it’s perfect for quick dishes like Taco Soup.
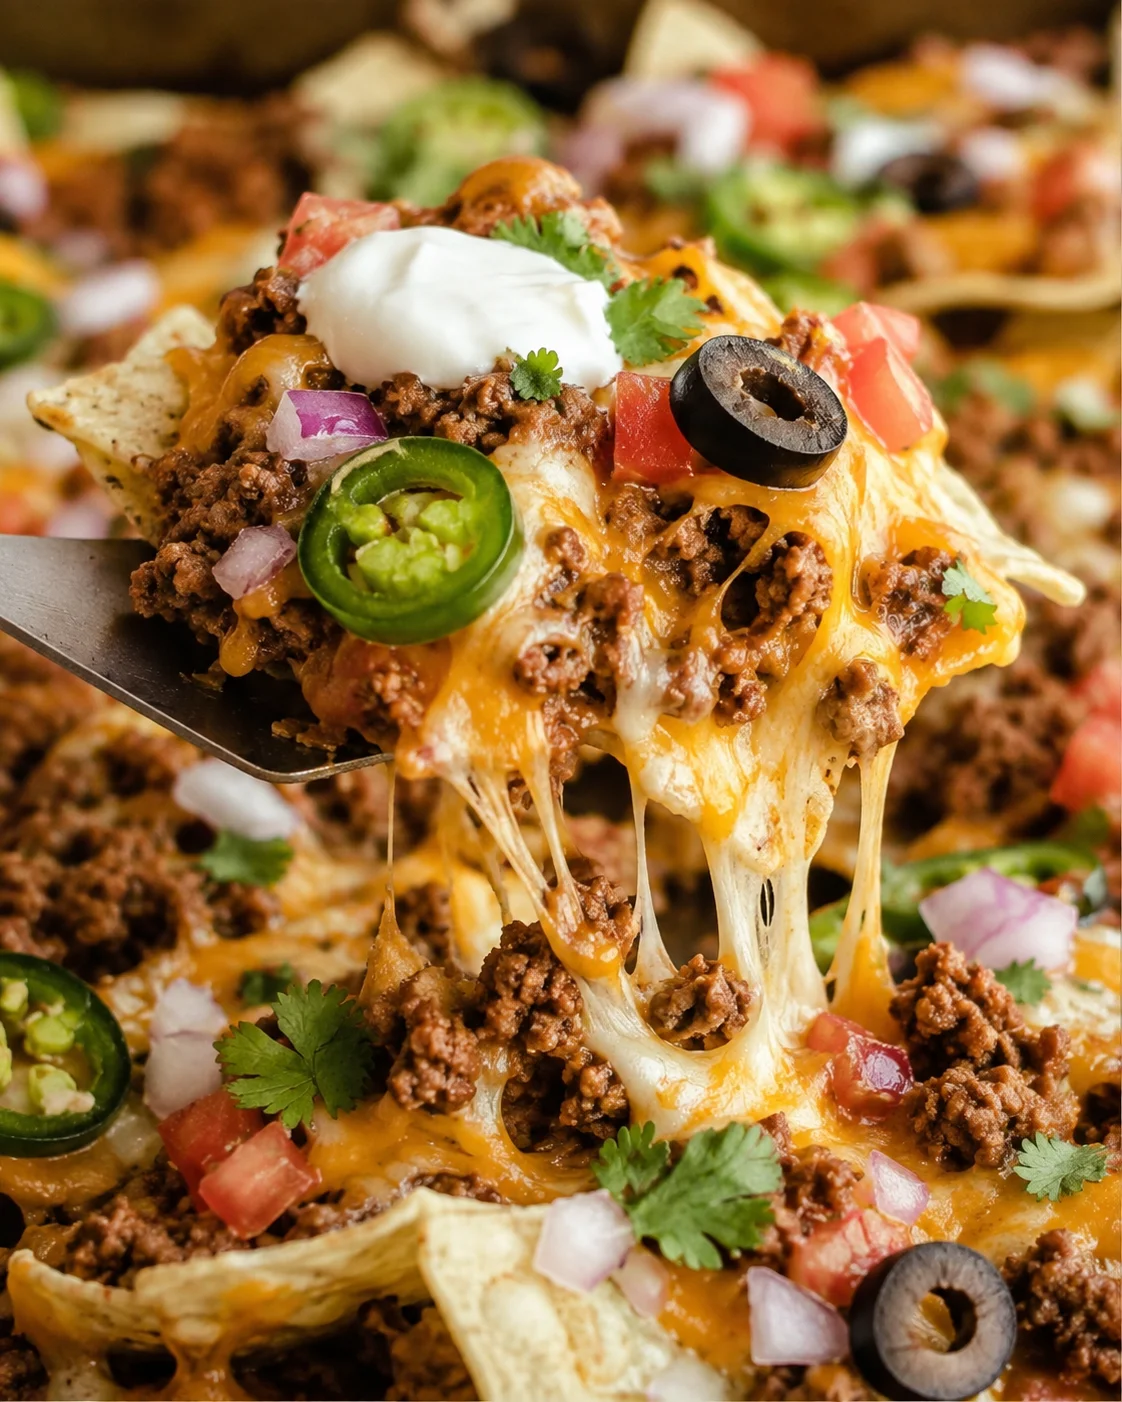
Layered nachos baked on a sheet pan with seasoned ground beef, melted cheese, and fresh toppings, designed to keep chips crispy and cheese gooey, serving about 8 people in around 25 minutes.
- Prep Time: 7 minutes
- Cook Time: 8 minutes
- Total Time: 15 minutes
- Yield: Serves about 8
- Category: Appetizer
Ingredients
- 1 Pound lean ground beef (85/15 or 90/10)
- 1 Package Taco Seasoning
- 1 13-ounce Bag Tortilla Chips (thick, restaurant-style recommended)
- ½ Cup Water
- Roma tomatoes, seeded and diced (quantity as desired)
- ½ Cup Red Onion, diced
- Fresh Cilantro (quantity as desired)
- 3 cups freshly shredded cheese (Cheddar, Monterey Jack, or Colby Jack)
- Jalapenos (sliced, quantity as desired)
- Black Olives (sliced, quantity as desired)
- Sour Cream (for serving)
Instructions
- Preheat oven to 400°F (200°C). Line a large rimmed baking sheet with foil or spray with non-stick spray.
- Brown the ground beef in a skillet over medium heat. Drain off the fat thoroughly.
- Stir in taco seasoning and water; simmer 3–5 minutes until the sauce thickens and clings to the meat.
- Spread half the tortilla chips evenly on the prepared sheet pan.
- Sprinkle half the beef mixture over the chips, then scatter half the shredded cheese over the beef.
- Add the remaining chips evenly on top, then top with the remaining beef and remaining shredded cheese.
- Bake at 400°F for 5–8 minutes or broil on high for 1–2 minutes until cheese is melted, bubbly, and chip edges are toasted (watch closely if broiling).
- Immediately top with diced tomatoes, diced red onion, sliced jalapenos, black olives, and chopped cilantro.
- Serve with sour cream and guacamole on the side or dolloped on top.
Notes
Allow nachos to cool fully before storing in an airtight container in the fridge for up to 2 days., Reheat leftovers in a 350°F oven for about 10 minutes to keep chips crisp., Store fresh toppings like sour cream and guacamole separately and add them after reheating for best texture and flavor., Avoid microwaving leftovers to prevent soggy or rubbery chips; use oven reheating instead., You can prepare seasoned taco meat up to 2 days ahead and refrigerate before assembly and baking.
Nutrition
- Calories: 241 kcal per serving
- Fat: 15 g per serving
- Carbohydrates: 4 g per serving
- Protein: 22 g per serving
More in Everyday Meals
Page not found | Mommy Made That
Cream Cheese Fruit Dip – Easy 4-Ingredient Recipe