Pineapple Pie Recipe with Golden Lattice Crust: A Fresh, Fruity Showstopper
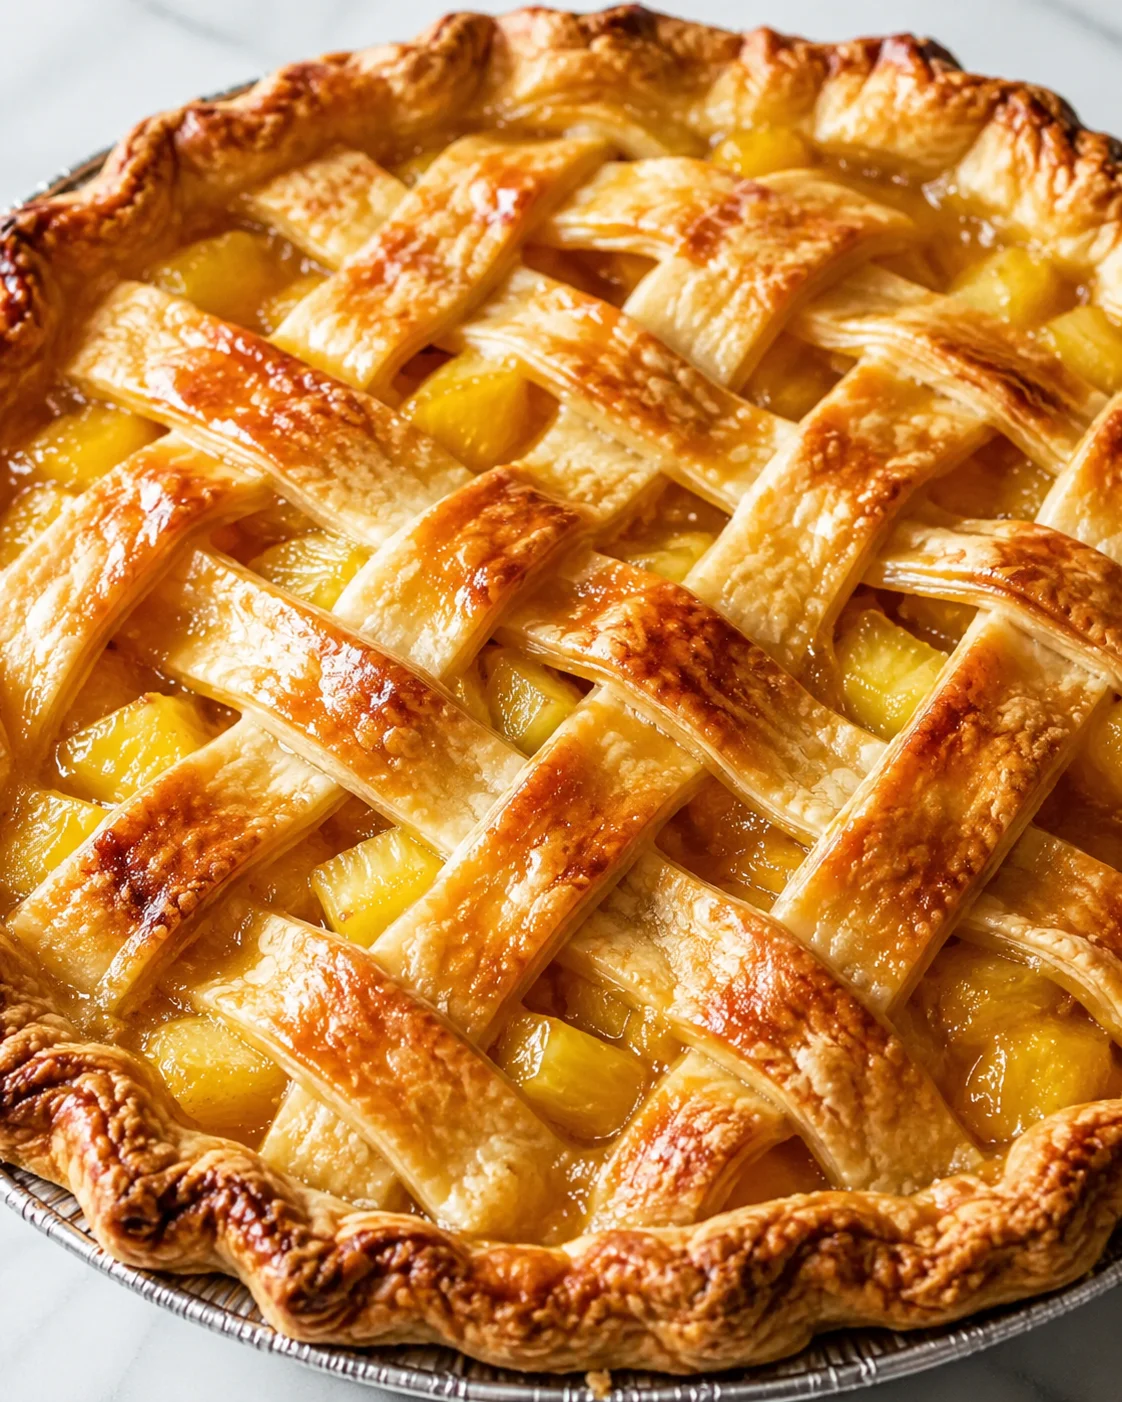
Pineapple pie doesn’t usually pop up on people’s go-to dessert lists, but that’s exactly why it deserves a spot in your recipe box. This pineapple pie recipe delivers something special: a thick, jammy pineapple filling wrapped in a tender, buttery homemade crust. It doesn’t rely on whipped cream or crumb toppings to shine—it lets the fruit take center stage.
You’ll discover how to make a pineapple pie that works beautifully with either fresh or canned pineapple. I’ll show you the secrets to getting that shiny, sliceable filling and how to weave a lattice crust that stays put. I’ve baked this pie on sunny afternoons with a cooled mixer bowl and also during a summer storm, kneading dough with sticky fingers. Every single time, it has been absolutely worth the effort.
This filling walks the perfect line between sweet and tart. The pineapple flavor shines through without drowning in sugar. The fresh lemon juice and a splash of vanilla lift the brightness, giving every bite a fresh, lively zing.
The crust is where texture steals the show. Using cold butter and icy water is my secret for those perfectly flaky layers. Don’t skip the chilling time—it’s essential. That rest makes the dough stronger and keeps your lattice neat and easy to handle.
If you’ve ever skimmed over pineapple desserts thinking they’re overly sweet or messy, this pineapple pie recipe is here to change your mind. It slices beautifully, holds together well on a fork, and looks stunning whether you’re sharing on a holiday or a laid-back weekend.
Bright Flavor and Buttery Crust
This pie really surprises people—the bright pineapple flavor stands front and center, wrapped up in a flaky, buttery crust that’s both comforting and fresh. It’s a pie that looks stunning and tastes even better. Let me share what makes this pineapple pie recipe a keeper you’ll want to come back to again and again.
- Fruit takes front stage: This filling puts pineapple in the spotlight, whether fresh or canned, without overloading on sweeteners. The lemon juice and vanilla gently enhance the natural zing of the pineapple so each bite bursts with clean, fresh flavor.
- Shiny, sliceable filling: The cornstarch-thickened base turns into a glossy, pudding-like texture that sets up nicely (much like a fresh homemade cherry pie filling). The pie slices cleanly and holds its shape—no gooey mess on your plate.
- Reliable flaky crust: Use cold butter and a good rest period to get tender, flaky layers that contrast perfectly with the jammy fruit. This crust recipe is forgiving, so you only need to mix until it comes together—no overworked dough here. For step-by-step guidance, see our double pie crust recipe.
- Lattice top for neat slices and charm: The open crust lets steam escape and helps the filling thicken while baking. This keeps the pie from getting soggy or bubbling over—and that lattice design? It’s classic and beautiful with minimal effort.
- Flexibility with ingredients and timing: Fresh pineapple offers that bright tang, but you can use canned if you want a winter-friendly shortcut. Store-bought crust works in a pinch, too, so you can make this work with what you have.
- Great for making ahead: The pie keeps nicely in the fridge for 3 to 4 days. For the best slices, let it fully cool for about 2 hours before cutting—perfect if you want to prep in advance or bring to a party.
- Easy to customize: This base recipe welcomes a few extras like toasted coconut, rum, or nuts if you want to switch things up without changing your technique.
- Look impressive without stress: The finished pie feels bakery-worthy, but the steps are simple to follow. It’s the perfect recipe to bring to gatherings and wow friends and family without sweating the details.
In a nutshell: this pineapple pie recipe is bright, dependable, and easy to tweak. It’s just the change-up your dessert line-up needs.
Crust and Filling Ingredients

- 2 cups chopped pineapple (fresh or canned, drained)
- 1/2 cup pineapple juice (from the can or fresh)
- 3/4 cup granulated sugar
- 1/4 cup cornstarch
- 1 tablespoon lemon juice
- 1/2 teaspoon vanilla extract
- Pinch of salt
- 2 1/2 cups all-purpose flour
- 1 tablespoon sugar
- 1 teaspoon salt
- 1 cup unsalted butter, cold and cubed
- 6 tablespoons ice water (plus more if needed)
- 1 egg
- 1 tablespoon milk
How to Make the Pie
- Stir together flour, sugar, and salt in a large bowl.
- Cut cold cubed butter into the flour mixture until it resembles coarse crumbs.
- Gradually add ice water 1 tablespoon at a time, mixing just until the dough holds together and is not sticky.
- Divide the dough into two discs, wrap each tightly, and refrigerate for at least 1 hour.
- If using canned pineapple, drain thoroughly and blot excess moisture with paper towels.
- Whisk sugar, cornstarch, and salt in a saucepan, then whisk in the pineapple juice and lemon juice until smooth.
- Cook the mixture over medium heat, whisking constantly, until it boils and thickens to a glossy, pudding-like texture.
- Remove from heat, stir in vanilla extract and chopped pineapple, and let the filling cool completely.
- On a lightly floured surface, roll one chilled dough disc into a 12-inch round and press it into a 9-inch pie pan, trimming edges as needed.
- Pour the cooled pineapple filling into the crust and spread it evenly to the edges.
- Roll out the second chilled dough disc and cut it into 1-inch strips; chill the strips 5–10 minutes if floppy.
-
Lay half the strips horizontally over the filling, then weave the remaining strips vertically to create a lattice; trim excess and crimp the edges to seal.

- Preheat the oven to 400°F (200°C).
- Whisk the egg and milk to make an egg wash and brush it over the lattice and crust edges.
- Bake the pie at 400°F for 35–40 minutes until the crust is golden and the filling is bubbling, covering the edges with foil halfway through if they brown too quickly.
- Allow the pie to cool at room temperature for at least 2 hours (or chill) so the filling fully sets before slicing.
Smart Tips for Crust and Filling
- Keep everything super cold. Cold butter and ice water are essential for flaky layers. Chill your dough discs for at least an hour before rolling.
- Don’t overmix the dough. Stir just until the dough sticks together so your crust stays tender and flaky.
- To avoid a soggy bottom, cook your filling until it’s thick and glossy before adding the pineapple—see the technique in our Triple Berry Pie. Also, cool the filling completely before filling the crust.
- If you use canned pineapple, drain it thoroughly and blot excess moisture with paper towels to keep the filling from getting watery.
- Chilling the dough strips for the lattice for 5-10 minutes makes weaving much easier and helps them hold their shape better; for a clear example of lattice weaving, see our Peach Mango Pie (flaky lattice pie).
- Watch out for edges browning too fast. If this happens, shield them with foil or a pie protector halfway through baking.
- Let your pie cool completely—at least two hours at room temperature or chill in the fridge—so the filling sets and your slices stay perfectly shaped.
- Use a fine whisk when cooking the filling to keep it smooth and lump-free.
Tropical Twists and Add-Ins
- Coconut Pineapple: Stir in 1/2 cup toasted shredded coconut into the cooled filling for a tropical twist, and sprinkle extra toasted coconut on top before serving. For an all-out coconut dessert, see our Coconut Cream Pie.
- Rum-Infused: Add 1-2 tablespoons dark rum to the filling right after you take it off the heat for subtle, grown-up depth (skip this if kids are eating).
- Nutty Crunch: Toss 1/2 cup chopped macadamia nuts or toasted pecans over the filling before adding your lattice for a satisfying crunch.
- Full Top Crust Option: If you prefer a simpler look, go for a full top crust with vents instead of lattice. Expect a bit more bubbling and a less open look.
- Mini Pies or Tartlets: This recipe works great for small pies. Use the same proportions to make 4-6 mini versions and bake for 20-25 minutes depending on size.
- Gluten-Free: Swap in a 1:1 gluten-free flour blend for the all-purpose flour and handle the dough gently. Chilling is even more important for gluten-free crusts.
How to Chill, Store, and Serve
The most important thing is to let this pie cool completely before slicing—that’s the secret to clean, pretty pieces. Serve it warm if you want, but expect the filling to be a bit soft and wobbly. Chilled slices hold their shape and taste fresh. If you love a similar tropical dessert that slices cleanly when chilled, try our Mango Tart Recipe – Easy Summer Tart with Fresh Mangos.
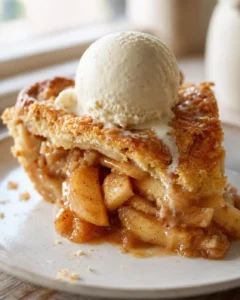
I love to sprinkle a little powdered sugar on top and serve with a scoop of whipped cream. For an extra special treat, vanilla ice cream pairs perfectly, adding creaminess without masking the pineapple’s brightness.
Got leftovers? Keep the pie covered in the fridge, where the crust will soften slightly but still tastes delicious. If you like your pie warm, just heat individual slices in the oven for a few minutes—it’s the best way to bring back that tender, just-baked feel. Baking for a celebration? Explore our Holiday Pie Recipes for more make-ahead pies that travel well.
Hands Free Mode:
Prevent screen from sleeping
Instructions
- MAKE THE PIE CRUST: In a large bowl, stir together flour, sugar, and salt. Add cold cubed butter and cut it into the flour using a pastry cutter or your fingers until the mixture forms coarse crumbs. Gradually drizzle in ice water, mixing just until the dough holds together. Divide the dough into two discs, wrap each in plastic wrap, and refrigerate for at least 1 hour.
- PREPARE THE PINEAPPLE FILLING: In a medium saucepan, whisk together sugar, cornstarch, and salt. Add pineapple juice and lemon juice, whisking until smooth. Cook over medium heat, whisking constantly, until the mixture boils and thickens into a glossy, pudding-like texture. Remove from heat, stir in vanilla extract and chopped pineapple, and let the filling cool completely.
- ROLL OUT THE DOUGH: On a lightly floured surface, roll out one chilled dough disc into a 12-inch round. Transfer it to a 9-inch pie pan and press it gently into the bottom and sides. Trim the edges if needed. Pour the cooled pineapple filling into the crust and spread evenly.
- MAKE THE LATTICE TOP: Roll out the second dough disc and cut it into 1-inch wide strips. Lay half of the strips horizontally over the filling, spacing them evenly. Weave the remaining strips vertically to create a lattice pattern. Trim excess dough and crimp the edges to seal.
- BAKE THE PIE: Preheat the oven to 400°F (200°C). In a small bowl, whisk the egg and milk together to make an egg wash. Brush it over the lattice and edges of the crust. Bake the pie for 35–40 minutes, or until the crust is golden and the filling is bubbling. If the edges brown too quickly, cover them loosely with foil.
- COOL AND SERVE: Allow the pie to cool at room temperature for at least 2 hours so the filling can fully set. Serve with a dusting of powdered sugar, whipped cream, or a scoop of vanilla ice cream if desired.
Notes
You can substitute canned pineapple chunks for fresh if desired—just make sure they are well-drained. For easier lattice weaving, chill the dough strips for a few minutes before placing them on the pie.
Ingredients
- FOR THE PIE FILLING
- 2 cups chopped pineapple (fresh or canned, drained)
- 1/2 cup pineapple juice (from the can or fresh)
- 3/4 cup granulated sugar
- 1/4 cup cornstarch
- 1 tablespoon lemon juice
- 1/2 teaspoon vanilla extract
- Pinch of salt
- FOR THE PIE CRUST
- 2 1/2 cups all-purpose flour
- 1 tablespoon sugar
- 1 teaspoon salt
- 1 cup unsalted butter, cold and cubed
- 6 tablespoons ice water (plus more if needed)
- FOR ASSEMBLY
- 1 egg
- 1 tablespoon milk
- Powdered sugar (optional, for dusting)
- Whipped cream or vanilla ice cream (for serving)
Answers to Common Pineapple Pie Questions
-
Can I use canned pineapple instead of fresh?
Absolutely! Just be sure to drain canned pineapple well and pat it dry before adding it to the filling. Canned pineapple works year-round and gives a softer, sweeter texture, while fresh pineapple offers a brighter, tangier bite.
-
Why is my filling runny?
Runny filling usually means the cornstarch wasn’t cooked long enough or there was too much liquid from the fruit. Make sure to cook the filling until it’s shiny and thick, and allow it to cool before adding it to your crust. Also, if you use canned pineapple, drain it really well.
-
Can I make this pie ahead of time?
Definitely! Bake the pie and keep it covered in the fridge for 3 to 4 days. For the best texture, bring slices to room temperature or warm them briefly in a low oven before serving.
-
Can I use store-bought pie dough?
Yes! Store-bought dough is a handy shortcut. Just chill the dough strips if they get soft while handling, and follow the same baking time and temperature, watching for browning at the edges.
-
How do I reheat pie slices?
Warm individual slices in a 300°F (150°C) oven for 8 to 12 minutes until heated through. You can microwave briefly (20–30 seconds) for a quick warm-up, but this might soften the crust.
-
What if the crust edges brown too fast?
Cover the edges loosely with foil or a pie crust shield halfway through baking to keep them from over-browning while the filling finishes cooking.
A bright, fresh pineapple pie featuring a thick, shiny pineapple filling made with fresh or canned pineapple, and a tender, flaky homemade buttery crust topped with a classic lattice design.
- Prep Time: 1 hour 20 minutes
- Cook Time: 40 minutes
- Total Time: 2 hours
- Yield: 8 servings 1x
- Category: Dessert
- Cuisine: American
Ingredients
- 2 cups chopped pineapple (fresh or canned, drained)
- 1/2 cup pineapple juice (from the can or fresh)
- 3/4 cup granulated sugar
- 1/4 cup cornstarch
- 1 tablespoon lemon juice
- 1/2 teaspoon vanilla extract
- Pinch of salt
- 2 1/2 cups all-purpose flour
- 1 tablespoon sugar
- 1 teaspoon salt
- 1 cup unsalted butter, cold and cubed
- 6 tablespoons ice water (plus more if needed)
- 1 egg
- 1 tablespoon milk
- Powdered sugar (optional, for dusting)
- Whipped cream or vanilla ice cream (for serving)
Instructions
- In a large bowl, stir together flour, sugar, and salt.
- Cut cold cubed butter into the flour mixture until it resembles coarse crumbs.
- Gradually add ice water 1 tablespoon at a time, mixing just until the dough holds together and is not sticky.
- Divide the dough into two discs, wrap each tightly in plastic wrap, and refrigerate for at least 1 hour.
- If using canned pineapple, drain thoroughly and blot excess moisture with paper towels.
- Whisk sugar, cornstarch, and salt in a saucepan, then whisk in pineapple juice and lemon juice until smooth.
- Cook the mixture over medium heat, whisking constantly, until it boils and thickens to a glossy, pudding-like texture.
- Remove from heat, stir in vanilla extract and chopped pineapple, then cool the filling completely.
- On a lightly floured surface, roll one chilled dough disc into a 12-inch round, place in a 9-inch pie pan, and trim edges.
- Pour the cooled pineapple filling into the crust and spread evenly.
- Roll out the second chilled dough disc and cut into 1-inch strips; chill strips 5–10 minutes if floppy.
- Lay half the strips horizontally over the filling, then weave the remaining strips vertically to create a lattice; trim excess and crimp edges to seal.
- Preheat oven to 400°F (200°C).
- Whisk egg and milk together to make an egg wash; brush over lattice and crust edges.
- Bake pie for 35–40 minutes until crust is golden and filling bubbles; cover edges with foil if browning too quickly.
- Cool pie at room temperature for at least 2 hours until filling sets before slicing and serving.
Notes
Substitute canned pineapple for fresh but ensure it is well drained., Chilling dough strips before weaving helps them hold shape better., If edges brown too fast, cover with foil or pie shield during baking., Let pie cool completely for clean slices., Use a fine whisk to keep filling smooth and lump-free., Pie can be refrigerated for 3 to 4 days; reheat slices in oven at 300°F for 8–12 minutes., Store-bought pie dough can be used as a shortcut, chilling dough strips if soft before handling.
Nutrition
- Serving Size: 1 slice
- Calories: Approx. 350 calories per serving
- Fat: 15 g per serving
- Carbohydrates: 48 g per serving
- Protein: 3 g per serving
More in Uncategorized