20 Minute Mini Baked Chicken Tacos

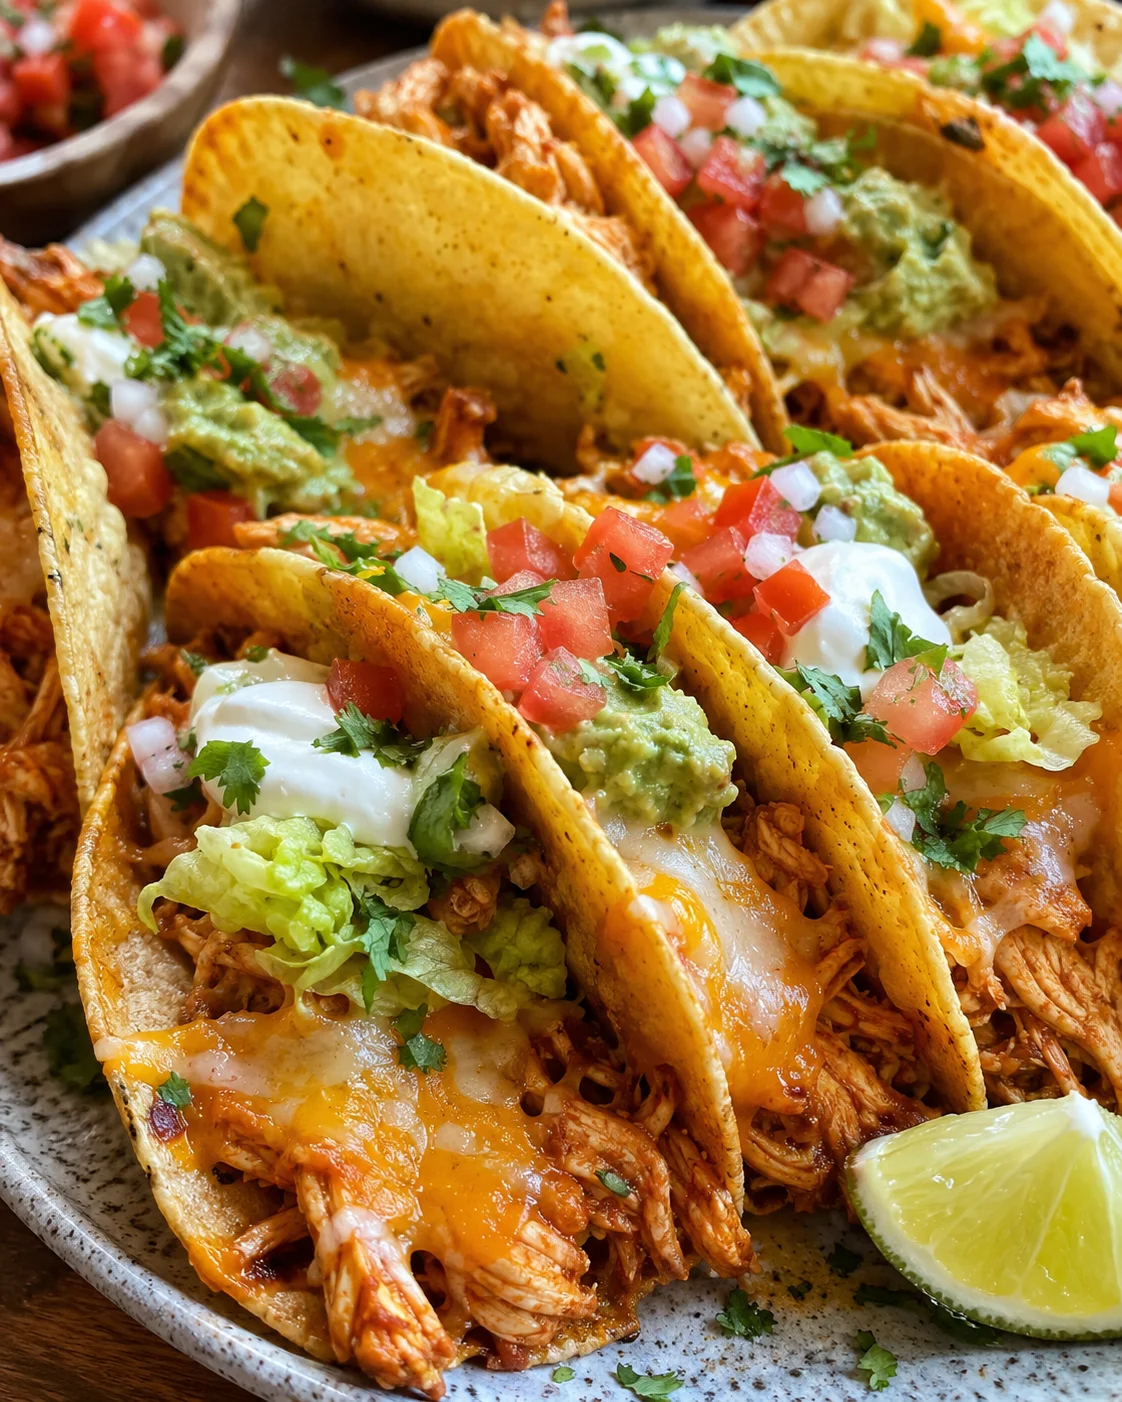
When you’re in the mood for something quick, tasty, and fun to eat, 20-Minute Mini Baked Chicken Tacos are your new best friend. These little tacos make weeknight dinners, game-day snacks, or party appetizers super easy and delicious. With just a handful of simple ingredients, you can have a batch of these cheesy, crispy mini baked chicken tacos ready in no time. The cherry on top? They take only 20 minutes from start to finish, perfect for those busy nights when you want big flavor without all the fuss.
Inside each mini taco, you’ll find savory shredded chicken seasoned just right, melted cheese, and a tangy taco sauce all nestled in crunchy baked taco shells. Every bite delivers that comforting, tasty punch we all crave. Plus, you can load them up with all your favorite toppings like creamy sour cream, fresh guacamole, zesty pico de gallo, or crisp shredded lettuce to add even more flavor and texture.
Whether you’re throwing them together for a quick family meal or setting up a lively taco bar for friends, these Mini Baked Chicken Tacos are always a hit. Trust me, they’ll be your new go-to snack or dinner night favorite!
These 20-Minute Mini Baked Chicken Tacos are fast, flavorful, and fun—exactly what you want when you don’t have time to mess around in the kitchen. Perfect for weeknights, parties, or anytime hunger strikes, these cheesy, crispy treats are easy to customize and sure to satisfy. And the best part? You get delicious tacos ready in just 20 minutes, so you can get back to what matters most.
I hope you love making and munching on these mini baked chicken tacos as much as my family does! Have fun playing around with toppings and fillings, and be sure to share them with loved ones for a taco night to remember.
Looking for a quick and tasty dinner or a fun snack that everyone will enjoy? These 20-Minute Mini Baked Chicken Tacos are exactly what you need. Little crunchy shells filled with seasoned shredded chicken and gooey melted cheese come together in just about 20 minutes—making them perfect for busy evenings, game days, or casual hangouts.
In this guide, I’ll walk you through everything you need to whip these up: a simple ingredient list (pro tip: rotisserie chicken is your shortcut), easy-to-follow steps for assembling and baking, plus quick tips for getting those shells perfectly crispy and the cheese wonderfully melted. You’ll also find ideas for toppings, easy tweaks (including vegetarian and low-carb options), make-ahead and storage tricks, and answers to all the common questions, so you can make these mini baked chicken tacos exactly to your liking.
Keep reading and you’ll be ready to make a batch in no time—and then have fun making them totally your own with different sauces, toppings, and fillings.
What Makes Them Irresistible
- Quick and Easy: Ready in just 20 minutes, these tacos are perfect when dinner needs to hit the table fast.
- Cheesy and Delicious: Seasoned chicken paired with melty cheese inside crispy shells is pure comfort food magic.
- Customizable: Switch out the chicken for ground beef (try these baked beef tacos), turkey, or a veggie filling—these mini tacos fit every diet and preference.
- Fun and Mini-Sized: Their bite-sized shape makes them perfect for kids or as tasty little appetizers for your next gathering.
- Great for Meal Prep: Make them ahead and reheat for an easy lunch or dinner option that tastes fresh and crispy.
Ingredients for Mini Baked Tacos
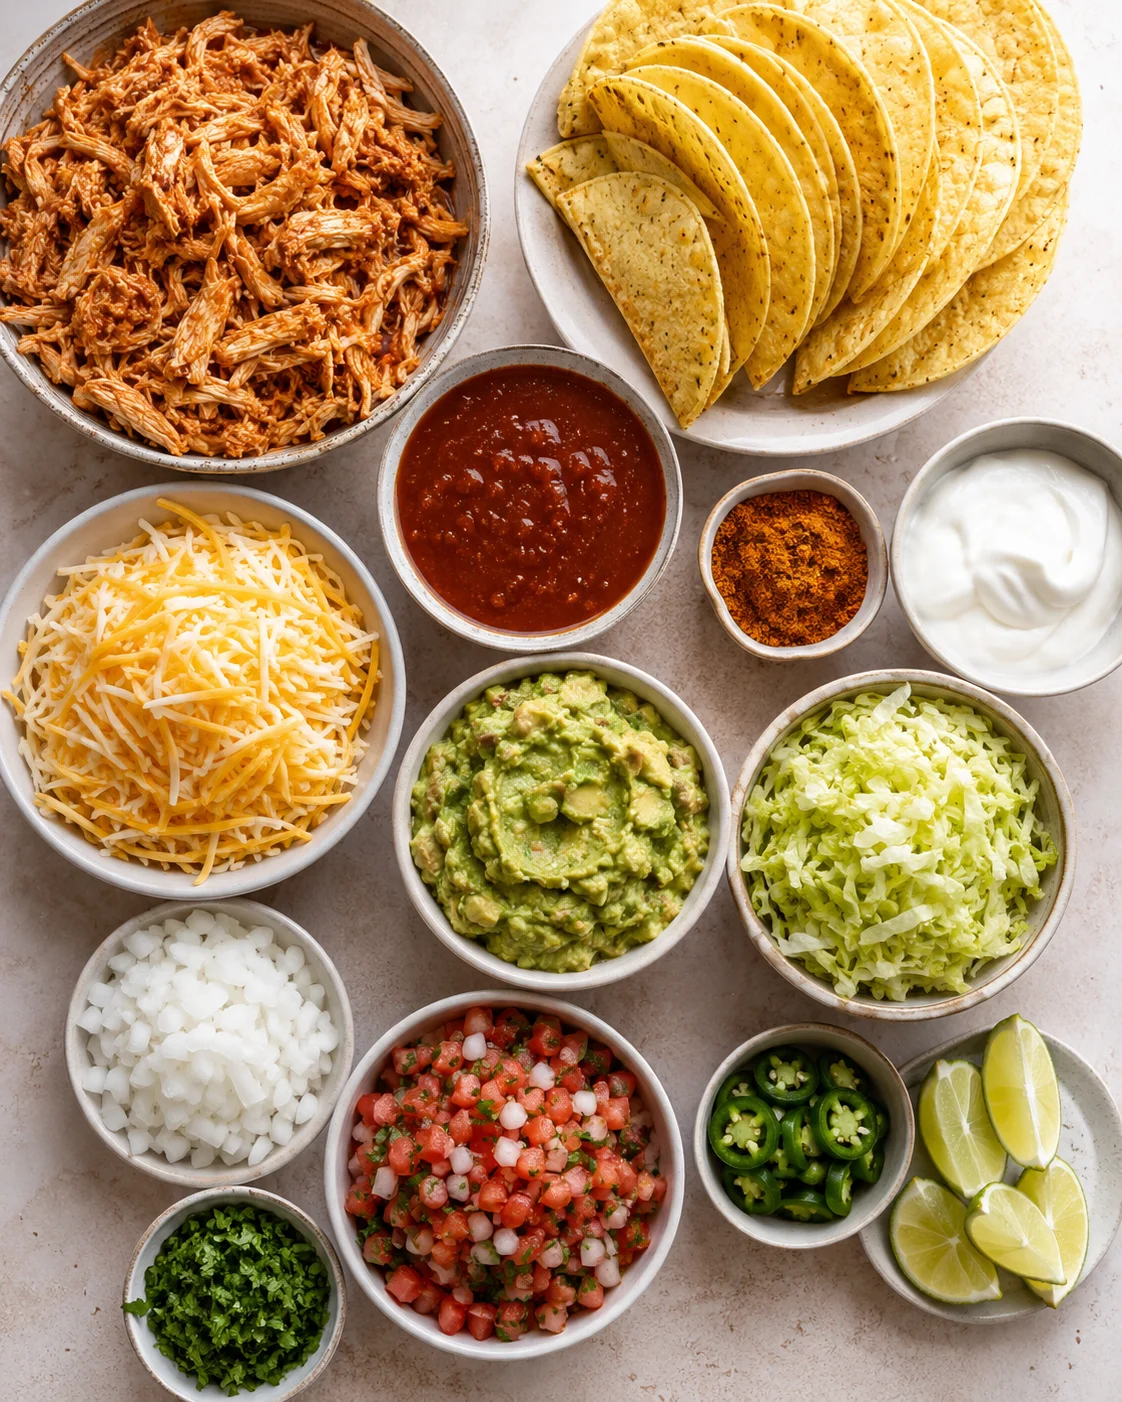
- 12 mini taco shells (or small corn tortillas—the size that fits your craving)
- 2 cups cooked shredded chicken (rotisserie chicken is such a time saver here)
- 1/2 cup taco sauce (or swap your fave salsa if you like more tang)
- 1 tablespoon taco seasoning (homemade or store-bought works great)
- 1 1/2 cups shredded Mexican blend cheese (cheddar, Monterey Jack, or whatever you prefer)
- 1/4 cup diced onions (optional but adds a nice little punch)
- 1 tablespoon olive oil (for brushing the shells crispy)
- 1/4 cup chopped fresh cilantro (to sprinkle on top)
- Sour cream
- Guacamole or sliced avocado
- Pico de gallo
- Shredded lettuce
- Jalapeños (optional, for some heat)
- Fresh lime wedges (for squeezing over the tacos)
Assembly and Baking Steps
- Preheat the oven to 400°F (200°C).
- Line a large baking sheet with parchment paper or lightly grease it with non-stick spray.
- (Optional) Pre-toast the taco shells in the oven 2–3 minutes for extra crispiness.
- Shred about 2 cups cooked chicken into bite-sized pieces.
- If the shredded chicken is very saucy, blot or press to remove excess moisture.
- In a mixing bowl, toss the shredded chicken with 1/2 cup taco sauce and 1 tablespoon taco seasoning until evenly coated.
- (Optional) Fold in 1/4 cup diced onions.
- Arrange 12 mini taco shells or small tortillas on the prepared baking sheet.
- Scoop about 2 tablespoons of the chicken mixture into each shell.
- Sprinkle about 1–2 tablespoons shredded Mexican blend cheese over each taco.
- Lightly brush the outside of each taco shell with olive oil.
-
Bake in the preheated oven 10–12 minutes, until cheese is melted and shells are golden and crispy.
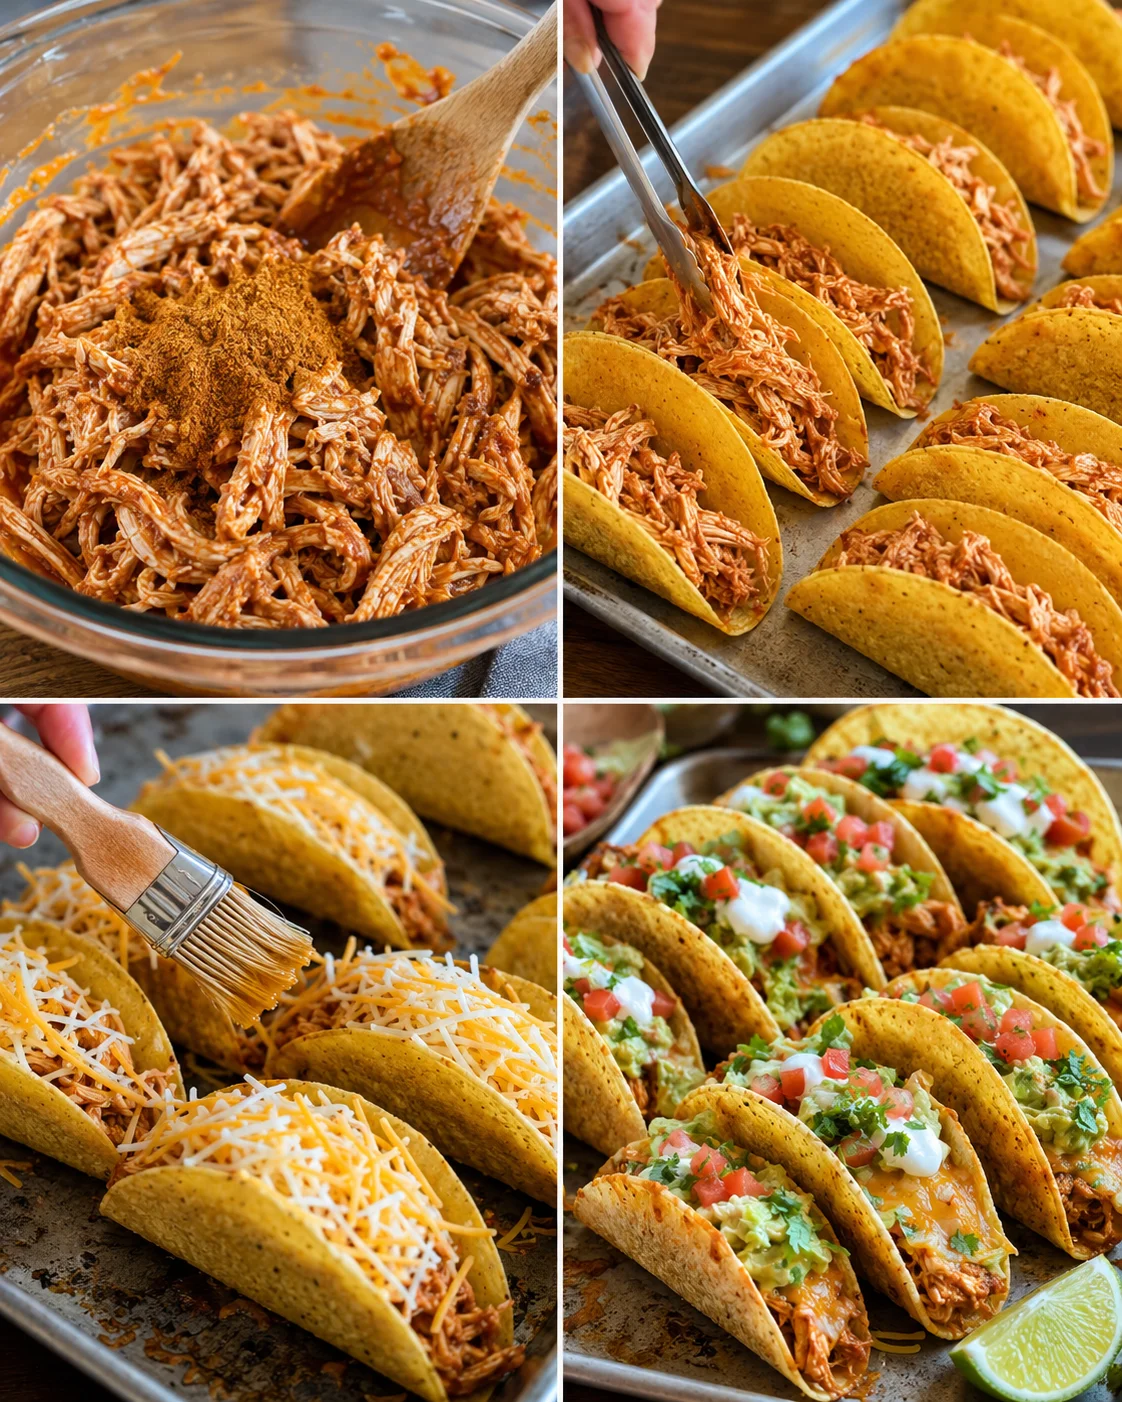
- (Optional) Broil 1–2 minutes at the end for extra browning, watching carefully to avoid burning.
- Remove tacos from the oven and add desired fresh toppings (sour cream, guacamole or avocado, pico de gallo, shredded lettuce, jalapeños).
- Sprinkle chopped cilantro over the tacos and serve with lime wedges to squeeze over them.
Pro Tips and Serving Ideas
Small tweaks can make a big difference with these mini baked chicken tacos. Use the tips below to keep shells crisp, speed things up, and boost flavor every time.
- Drain excess sauce: If your shredded chicken is really saucy (like rotisserie with salsa or BBQ), blot it gently with paper towels or press it in a fine strainer to remove extra moisture. Too much liquid turns shells soggy, and nobody wants that.
- Portion consistently: Grab a small cookie scoop or tablespoon to get about 2 tablespoons of filling per mini taco. This keeps them tidy and prevents them from falling apart when you bite into them.
- Seal with cheese: Layer a little cheese under the chicken and sprinkle some on top too. This cheese barrier helps keep the shells crisp and acts like tasty glue to hold it all together.
- Brush with oil or butter: Lightly brush just the outside of the shells with olive oil or melted butter to encourage that golden, crispy finish. Avoid the inside—too much oil there can get greasy and soggy.
- Keep shells upright: Use a muffin tin, a rack made from foil, or a baking sheet with supports so your mini taco shells stand nice and tall while you fill and bake. This prevents spills and uneven melting.
- Pre-toast for extra crisp: Want ultra-crispy shells? Toast them in the oven for 2 to 3 minutes before filling, then finish baking after assembly.
- Broil carefully: If you like a little brown on top, broil the tacos for just 1-2 minutes at the end. Stay close—the cheese and shells can burn fast under a broiler.
- Warm soft tortillas first: If you’re using mini flour or corn tortillas instead of hard shells, warm them for a few seconds in the microwave or a hot pan so they bend without cracking when shaped.
- Add fresh toppings after baking: Put watery toppings like salsa, guacamole, or pico right before serving to keep those shells crispy. Cilantro, lime, and hot sauce are good to add at the end too.
- Taste and adjust seasoning: Before filling your taco shells, taste your chicken mixture. Brighten it up with a squeeze of lime, a pinch of salt, or a dash more taco seasoning if it needs it.
- Speed up assembly: Set up an assembly line with filling, cheese, and oil brush ready so you fill all the shells quickly and get them in the oven while it’s still nice and hot.
- Best reheating: Leftovers reheat beautifully in a 350°F oven for 5-7 minutes or a few minutes in an air fryer to bring back that crispness. Microwaving makes shells soggy, so try to avoid if possible.
- As a Main Dish: Serve these mini baked chicken tacos for a quick and satisfying dinner. Pair them with a side of Mexican rice, some warm refried beans, or a crisp green salad to round out the meal.
- At a Party: These mini tacos are perfect finger food for parties or game-day snacks. Arrange them on a big platter and offer a spread of toppings so guests can personalize their bites. Round out the spread with a sweet-and-savory appetizer like Pineapple Sausage Bites with Hazy IPA Glaze, and finish with make-ahead Key Lime Bars for a bright, zesty dessert.
- For a Taco Bar: Set up a DIY taco bar with different toppings like salsa, various cheeses, lettuce, sour cream, and guacamole, letting everyone build their own version.
- With Drinks: Pair these tasty mini baked chicken tacos with a refreshing margarita, a cold beer, or a virgin mojito for the non-alcoholic crew.
- Use Rotisserie Chicken for Convenience: Rotisserie chicken is a total time-saver and adds great flavor. Any cooked shredded chicken will work if you don’t have rotisserie on hand.
- Make the Tacos Crispier: If you crave extra crunch, pop the tacos under the broiler for the last 1-2 minutes, watching carefully so they don’t burn.
- Don’t Overfill the Tacos: Keep each taco filled just right. Overstuffing makes them messy and harder to eat.
- Warm the Tortillas (If Using Soft Tortillas): Soft mini tortillas get more pliable with a brief warm-up, making filling easier without cracking.
- Use a Muffin Tin to Bake the Tacos: If you struggle to keep the taco shells upright, baking them in a muffin tin works like a charm, holding each shell nicely in place.
- Baking sheet or muffin tin to bake those mini tacos evenly.
- Tongs to easily move tacos on and off the baking sheet without crushing them.
- Pastry brush to brush on that crispy olive oil layer.
Easy Swaps and Flavor Twists
These Mini Baked Chicken Tacos are wonderfully flexible. Here are some fun ways to mix things up to fit your taste or diet.
1. Vegetarian Mini Tacos:
Skip the chicken and use refried beans, black beans, or a sauté of veggies like bell peppers, onions, and zucchini. Top with cheese or your favorite plant-based cheese for a vegan twist.
2. Spicy Beef Tacos:
Swap shredded chicken for seasoned ground beef or ground turkey. Brown the meat with taco seasoning, fill the shells, and bake as usual for classic flavors.
3. BBQ Chicken Tacos:
For a tasty twist, swap the taco sauce for barbecue sauce. Use cheddar cheese and diced red onions for a smoky, tangy mini taco everyone will love.
4. Breakfast Mini Tacos:
Fill your mini tacos with scrambled eggs, cooked bacon, and cheese, then bake until melty. Top with salsa and avocado for a fun morning treat.
5. Low-Carb Tacos:
Use crunchy lettuce leaves or low-carb tortillas in place of taco shells. Bake carefully, as these might need less time in the oven.
6. Buffalo Chicken Tacos:
Coat shredded chicken in Buffalo sauce instead of taco seasoning. Top with blue cheese crumbles and drizzle ranch dressing for a spicy Buffalo fan favorite.
Storing, Freezing, and Reheating
Storing Leftovers:
If you have any mini baked chicken tacos left over, store them airtight in the fridge for up to 3 days. To reheat, warm them in a 350°F oven for 5-7 minutes until heated through and crispy again.
Freezing the Tacos:
You can freeze these tacos too! Assemble but don’t bake. Freeze them flat on a tray until firm, then transfer to a freezer-safe bag. When ready, bake frozen tacos at 400°F for 15-18 minutes until hot and crispy.
Answers to Common Questions
1. Can I make these tacos ahead of time?
Yep! You can assemble the mini baked chicken tacos a day ahead. Cover tightly with plastic wrap and keep in the fridge until you’re ready to bake and eat—handy for party prep alongside a bake-ahead dessert like Fireworks Sugar Cookies.
2. Can I use soft tortillas instead of crunchy taco shells?
Definitely! Small corn or flour tortillas work well if you want soft tacos. Just note they won’t crisp up quite the same in the oven.
3. How can I make these tacos spicier?
Add diced jalapeños to the chicken filling, increase taco seasoning heat, or drizzle with hot sauce or sriracha after baking for a spicy kick.
4. Can I make these tacos gluten-free?
Absolutely! Use gluten-free taco shells or corn tortillas and double-check any seasoning or sauce ingredients to keep it safe for gluten-free diets.
5. What’s the best way to reheat these tacos?
The oven is your best friend for reheating—350°F for about 5-7 minutes keeps the shells crispy again. Avoid the microwave because it tends to make shells soggy.
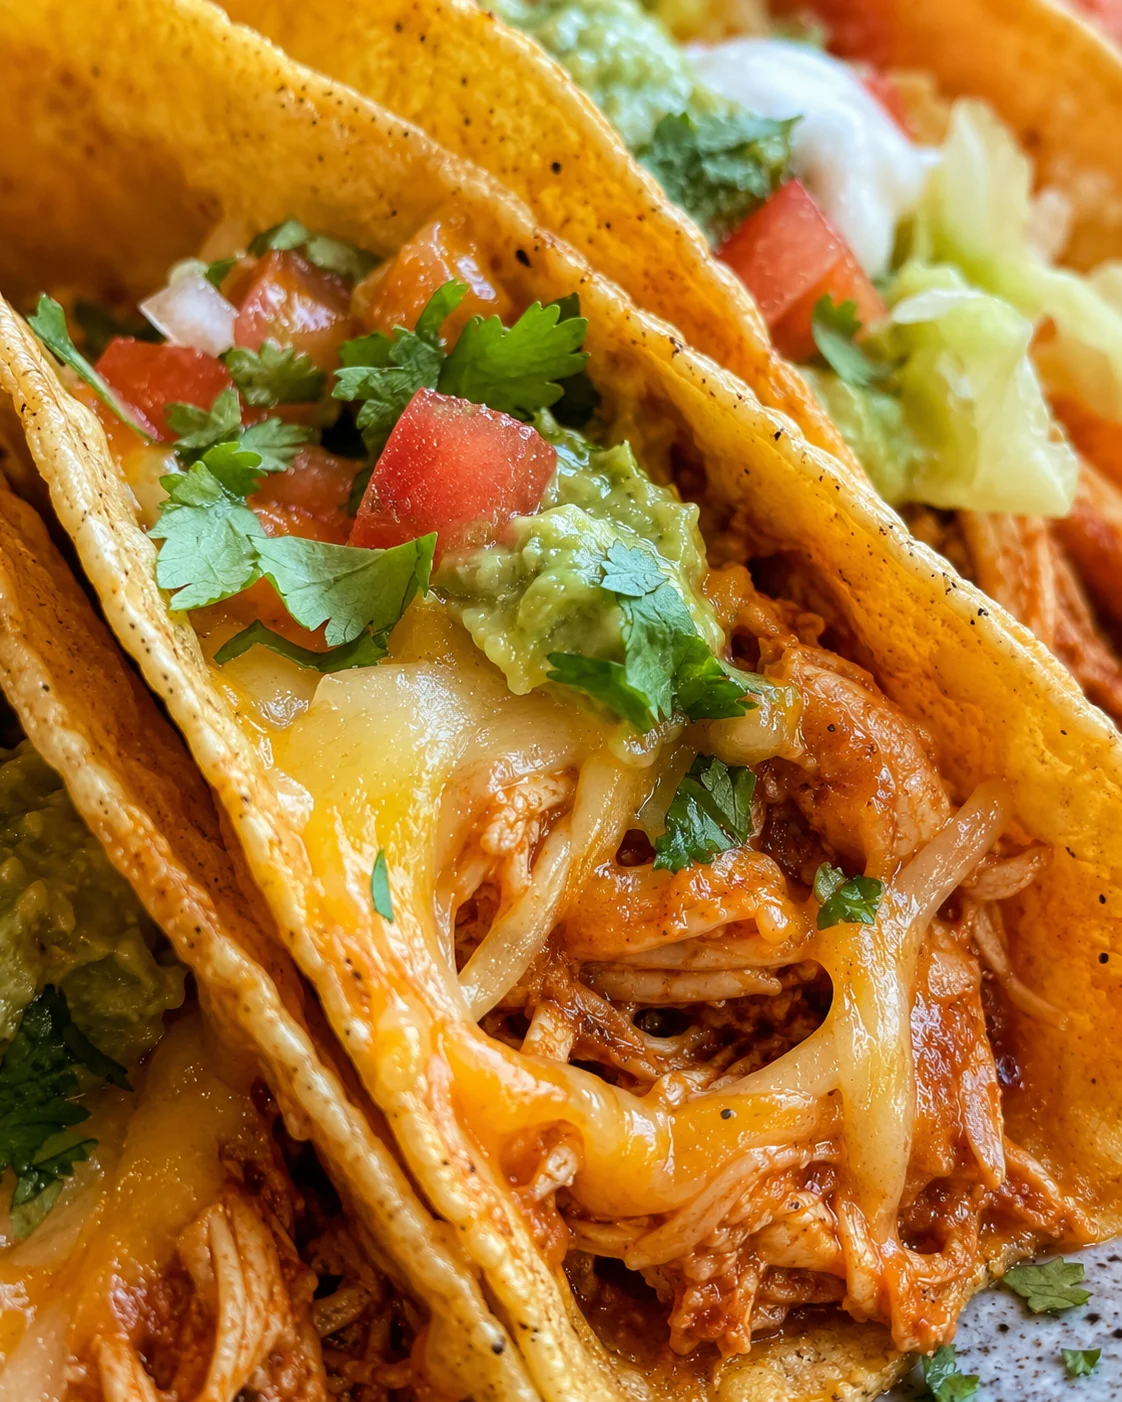
Quick and easy mini tacos filled with seasoned shredded chicken and melted cheese in crispy baked shells, perfect for weeknight dinners, game-day snacks, or party appetizers.
- Prep Time: 10 minutes
- Cook Time: 12 minutes
- Total Time: 22 minutes
- Yield: 12 mini tacos 1x
- Category: Main Course
- Cuisine: Mexican-inspired
Ingredients
- 12 mini taco shells or small corn tortillas
- 2 cups cooked shredded chicken (rotisserie chicken recommended)
- 1/2 cup taco sauce (or favorite salsa)
- 1 tablespoon taco seasoning (homemade or store-bought)
- 1 1/2 cups shredded Mexican blend cheese (cheddar, Monterey Jack, or preferred cheese)
- 1/4 cup diced onions (optional)
- 1 tablespoon olive oil (for brushing shells)
- 1/4 cup chopped fresh cilantro (for topping)
- Sour cream (for serving)
- Guacamole or sliced avocado (for serving)
- Pico de gallo (for serving)
- Shredded lettuce (for serving)
- Jalapeños (optional, for heat)
- Fresh lime wedges (for squeezing before serving)
Instructions
- Preheat oven to 400°F (200°C).
- Line a large baking sheet with parchment paper or lightly grease it with non-stick spray.
- Optional: Pre-toast the taco shells in oven for 2–3 minutes for extra crispiness.
- Shred about 2 cups cooked chicken into bite-sized pieces.
- If chicken is very saucy, blot or press to remove excess moisture.
- In a bowl, toss shredded chicken with 1/2 cup taco sauce and 1 tablespoon taco seasoning until well coated.
- Optional: Fold in 1/4 cup diced onions.
- Arrange 12 mini taco shells or small tortillas on the baking sheet.
- Scoop about 2 tablespoons of chicken mixture into each shell.
- Sprinkle 1–2 tablespoons shredded cheese over each taco.
- Lightly brush the outside of each taco shell with olive oil.
- Bake for 10–12 minutes until cheese is melted and shells are golden and crispy.
- Optional: Broil for 1–2 minutes at the end for extra browning, watch carefully.
- Remove from oven and add desired fresh toppings: sour cream, guacamole/avocado, pico de gallo, shredded lettuce, jalapeños.
- Sprinkle chopped cilantro over tacos and serve with fresh lime wedges.
Notes
Drain excess moisture from chicken to prevent soggy shells., Use a muffin tin or supports to keep taco shells upright during baking., Brush only the outside of shells with oil to ensure crispiness without greasiness., Warm soft tortillas briefly before filling to prevent cracking., Broil carefully as cheese and shells can burn quickly under heat., Leftovers reheat best in a 350°F oven or air fryer to maintain crispness; avoid microwaving.
Nutrition
- Serving Size: 1 mini taco
- Calories: Approximately 150-180 calories per mini taco (varies with toppings)
- Fat: 8 g per serving
- Carbohydrates: 10 g per serving
- Protein: 12 g per serving (1 mini taco)
More in Dinner